> ## Documentation Index
> Fetch the complete documentation index at: https://interceptor-docs.requestly.com/llms.txt
> Use this file to discover all available pages before exploring further.
# Record API Sessions
> Learn how to record APIs using Requestly Interceptor Desktop App, save and share API sessions, import HAR files, perform bulk mocking, and replay sessions for debugging.
***
**Recording API sessions** allows you to monitor and debug HTTP traffic between your application and the server. This can significantly improve debugging efficiency by providing insights into network behavior, as well as enhance testing workflows by enabling precise analysis of API interactions.
With the Requestly Interceptor Desktop App, you can capture and analyze network activity effortlessly. This guide will walk you through the steps to create, manage, and utilize API sessions effectively.
This feature is available only on Desktop App.
## How to Create an API Session in Requestly Interceptor
Creating an API session in Requestly Interceptor is straightforward, allowing you to record, import, and analyze network traffic with ease. Here are three methods to get started:
### Save Captured Live Traffic with HTTP Interceptor
One way to create an API session in Requestly Interceptor is by saving captured traffic using the **HTTP Interceptor** while monitoring a browser or an app’s traffic. This allows you to share or analyze the traffic later.
Here's how:
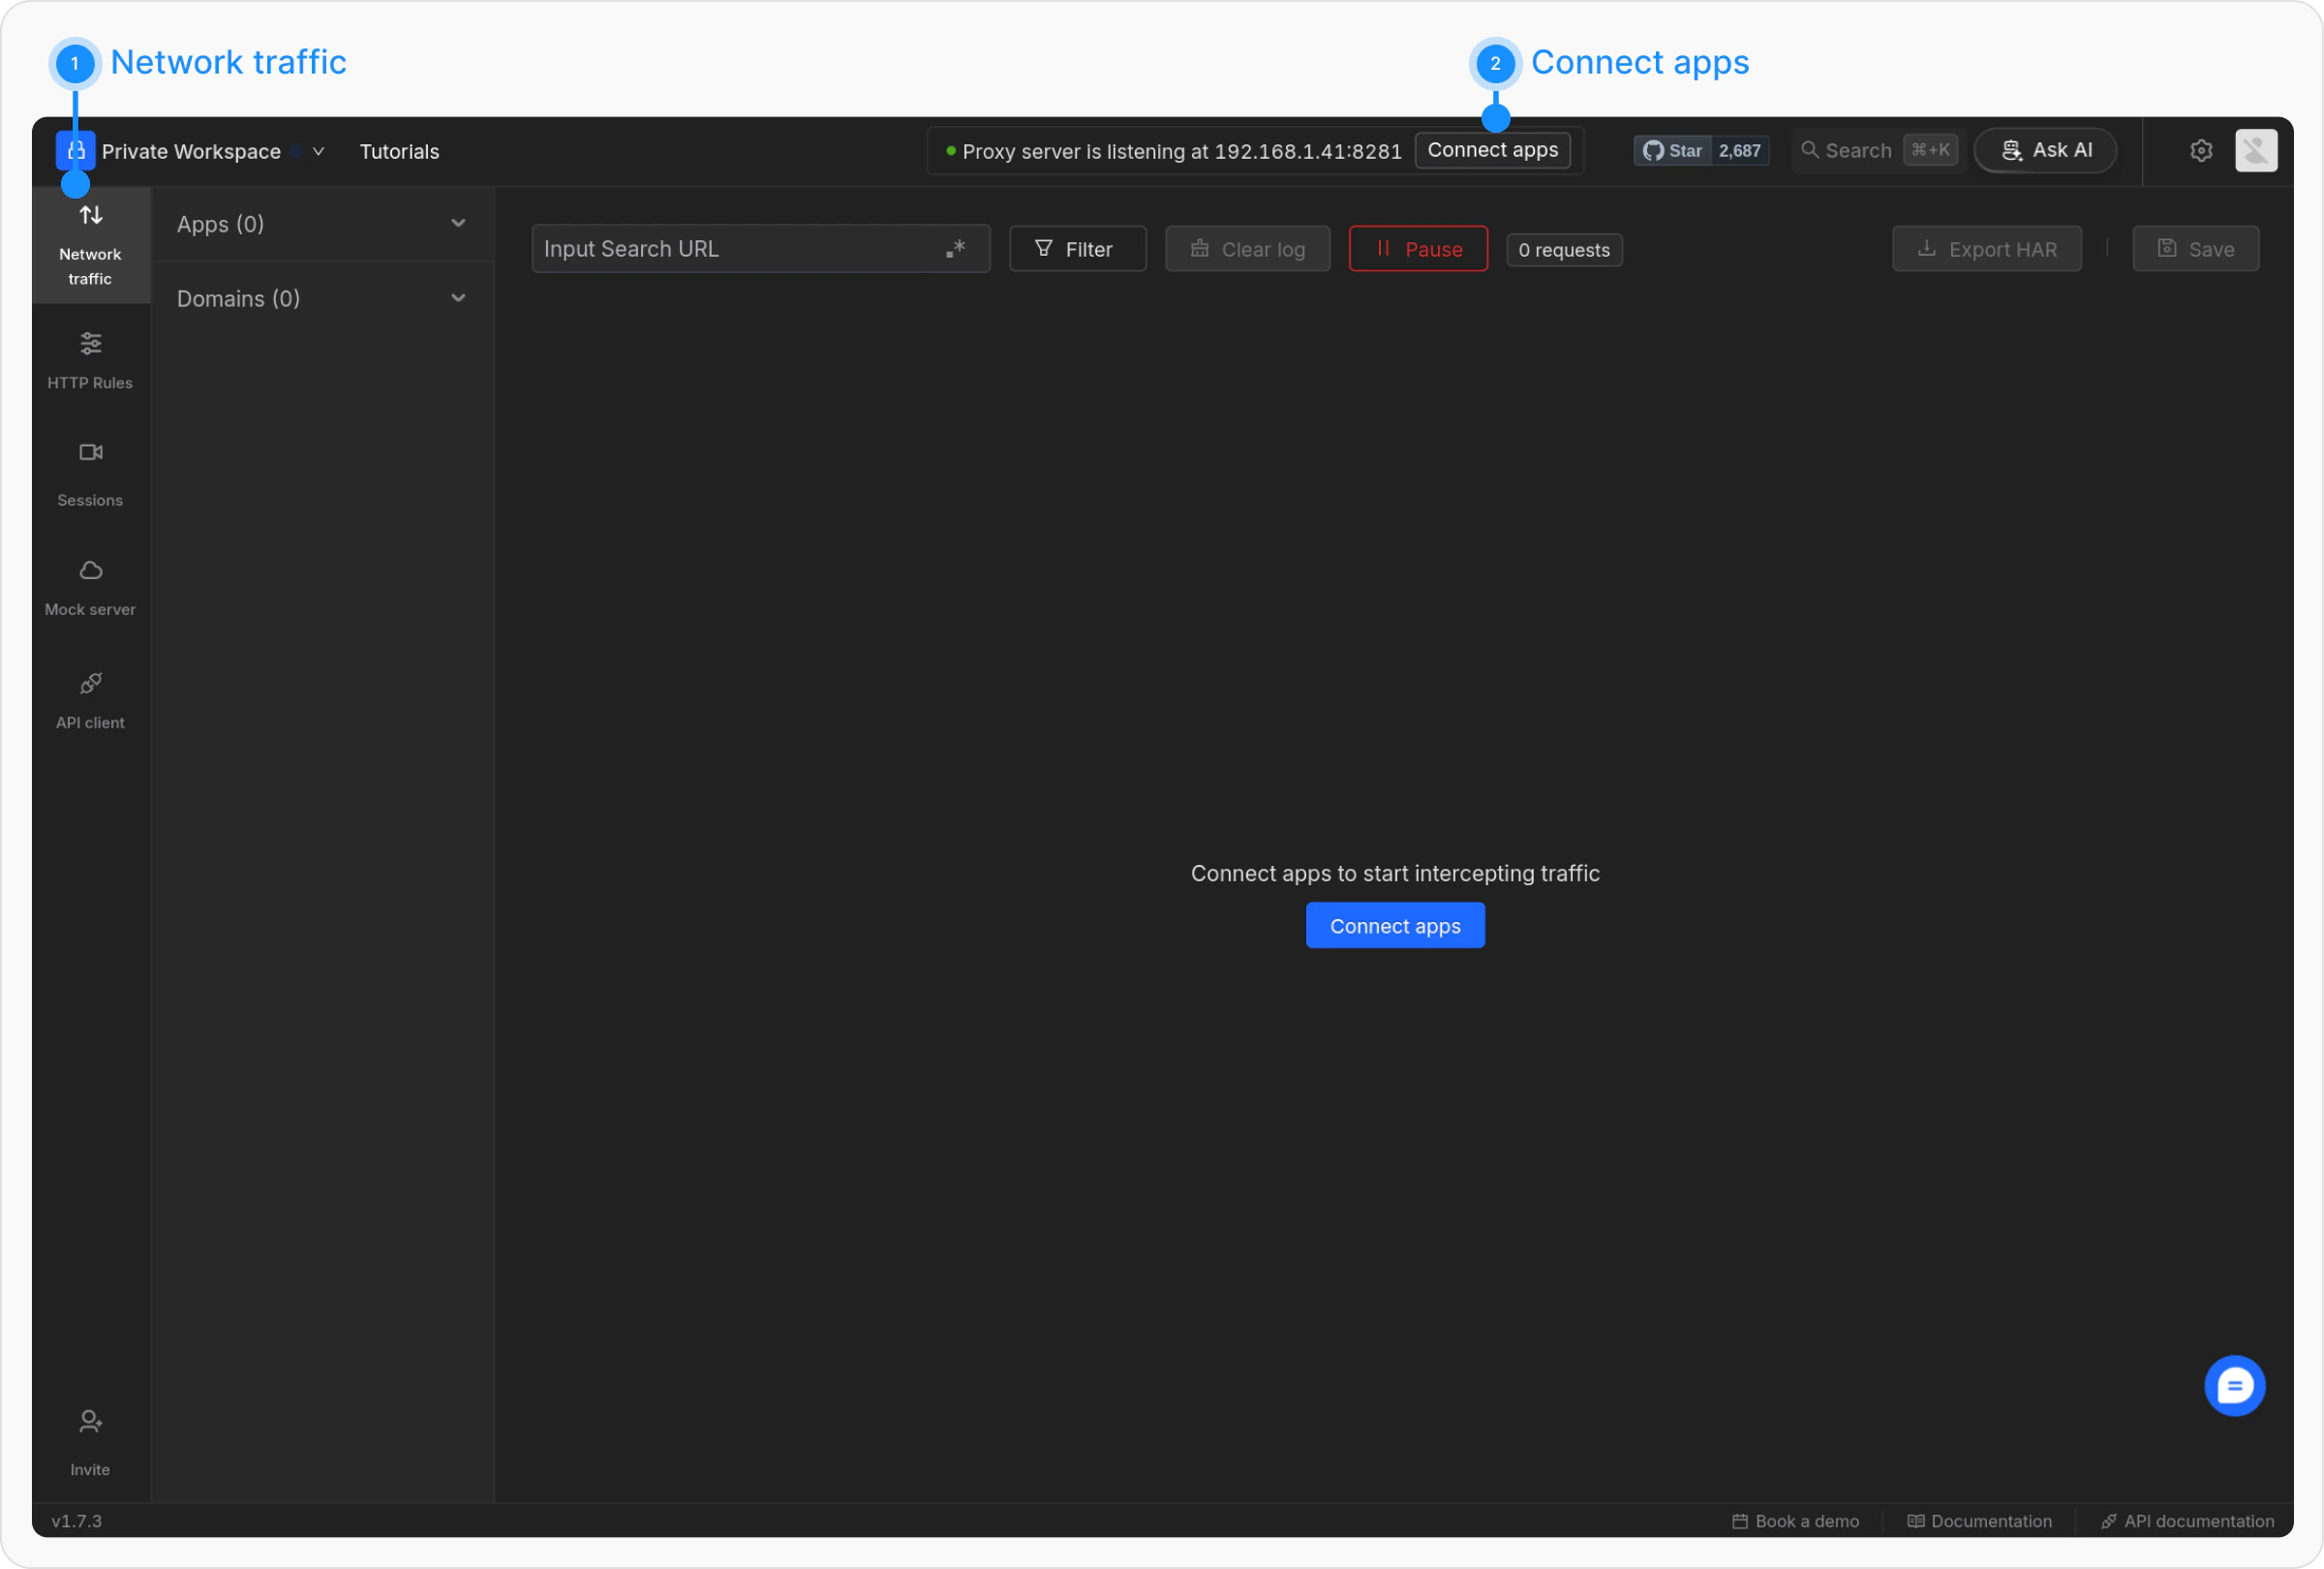
Open the Requestly Interceptor desktop and access the Network Table.
Click the `Connect Apps` button
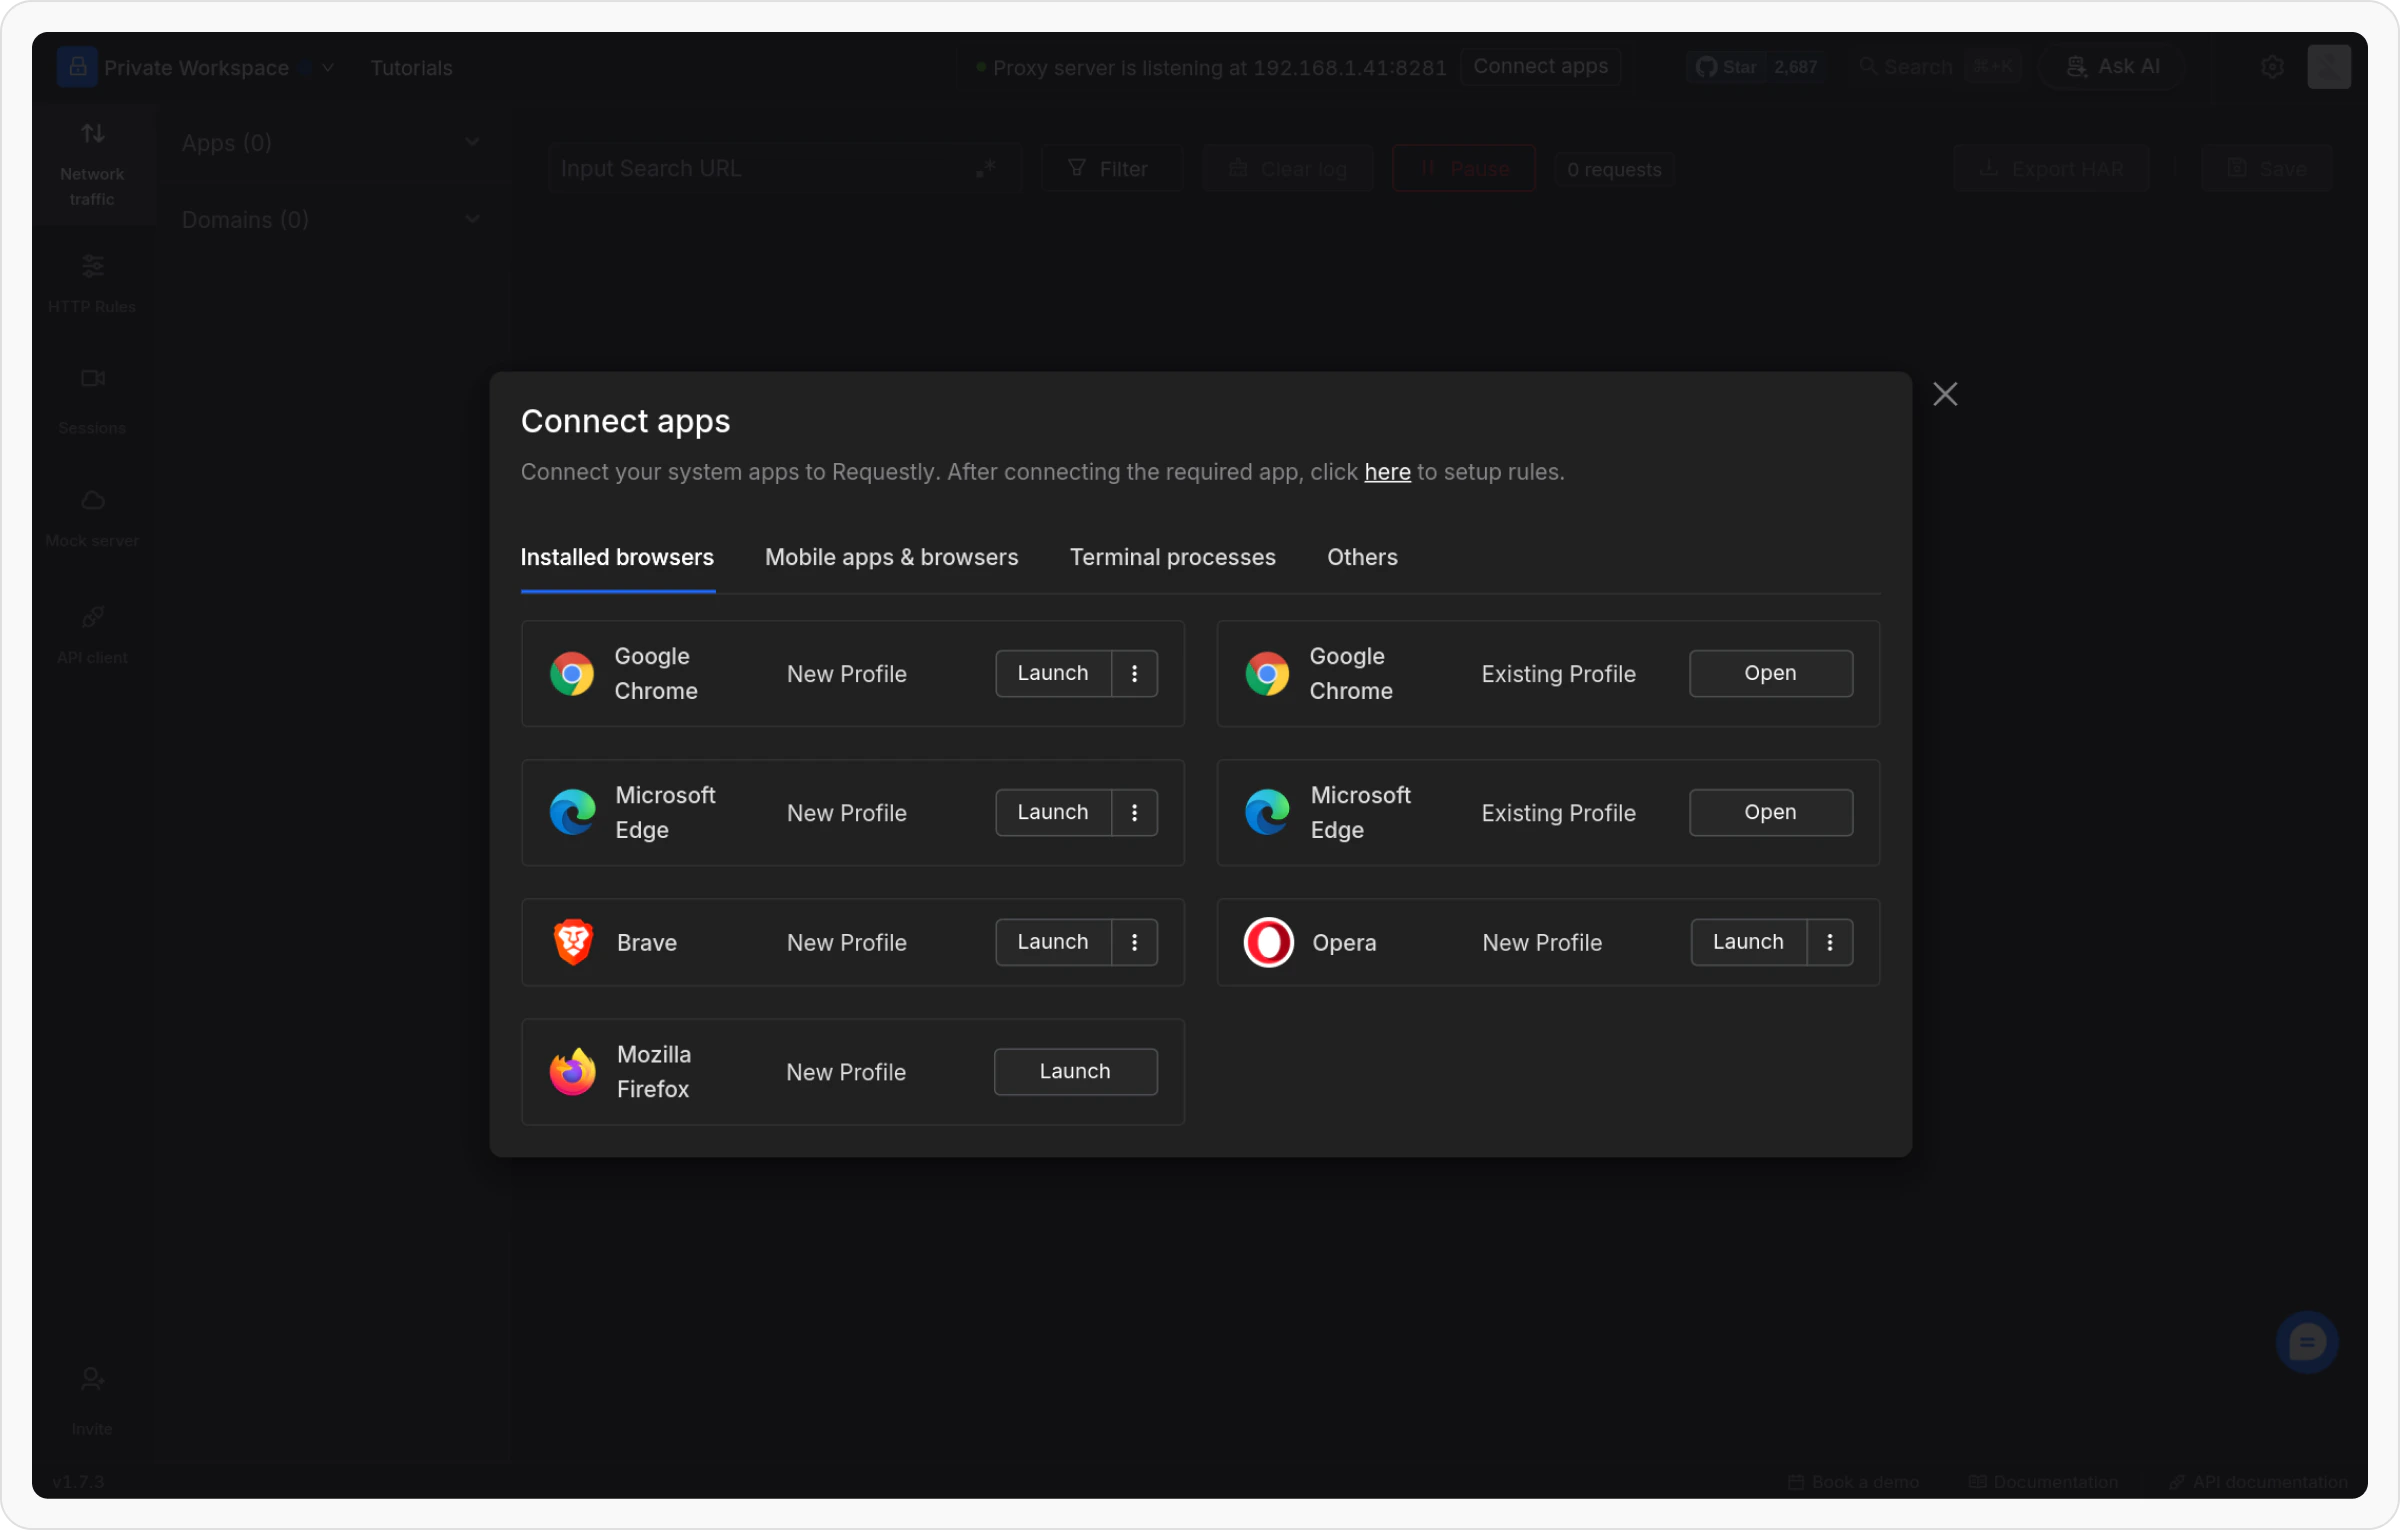
 Choose from where you want to intercept traffic (e.g., browser, Android, iOS). Click **Open/Launch** for browser traffic and follow the instructions for mobile traffic.
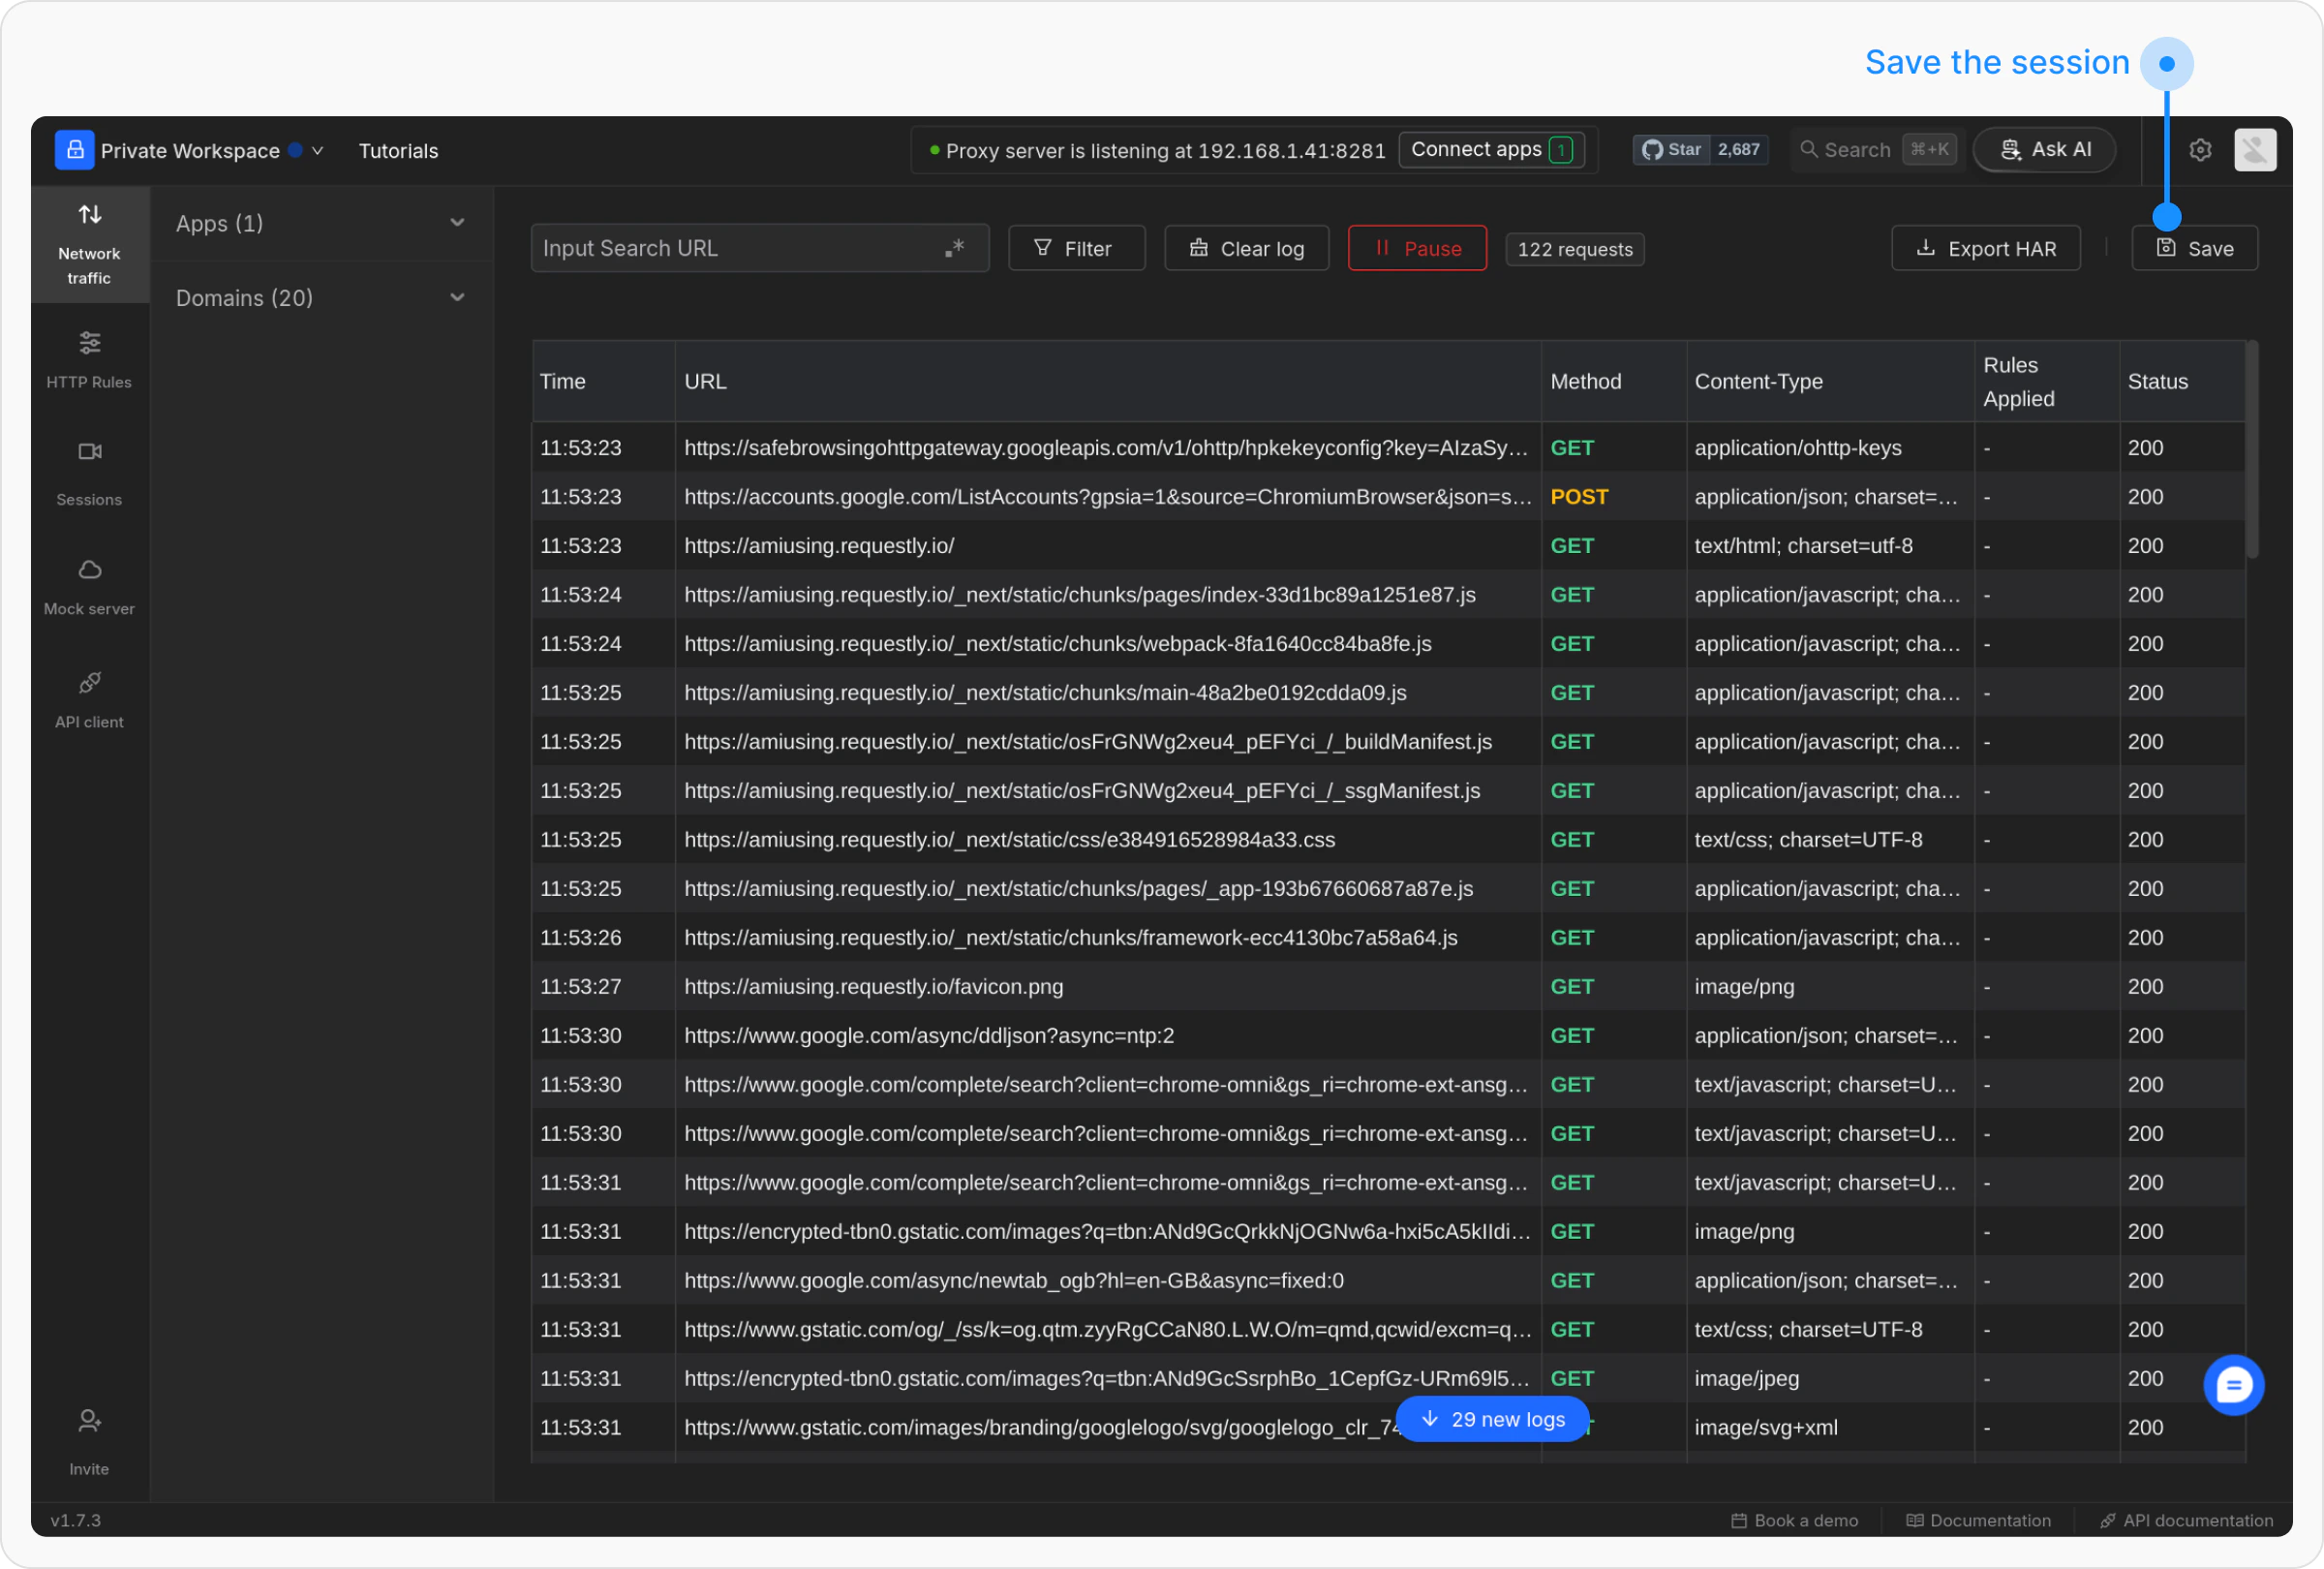
 As traffic gets intercepted, perform relevant activities. When you're ready to save the session, click the `Save` button.
 ### Import a HAR File
Another method is to **import a HAR file**, which can be generated from various sources, including browser network sessions, other interceptors, or even Requestly Interceptor's traffic interceptor.
Follow these steps:
Generate and **export the HAR** file from your preferred source.
In the Requestly Interceptor app, go to the **Sessions** tab and click **Import HAR**.
### Import a HAR File
Another method is to **import a HAR file**, which can be generated from various sources, including browser network sessions, other interceptors, or even Requestly Interceptor's traffic interceptor.
Follow these steps:
Generate and **export the HAR** file from your preferred source.
In the Requestly Interceptor app, go to the **Sessions** tab and click **Import HAR**.
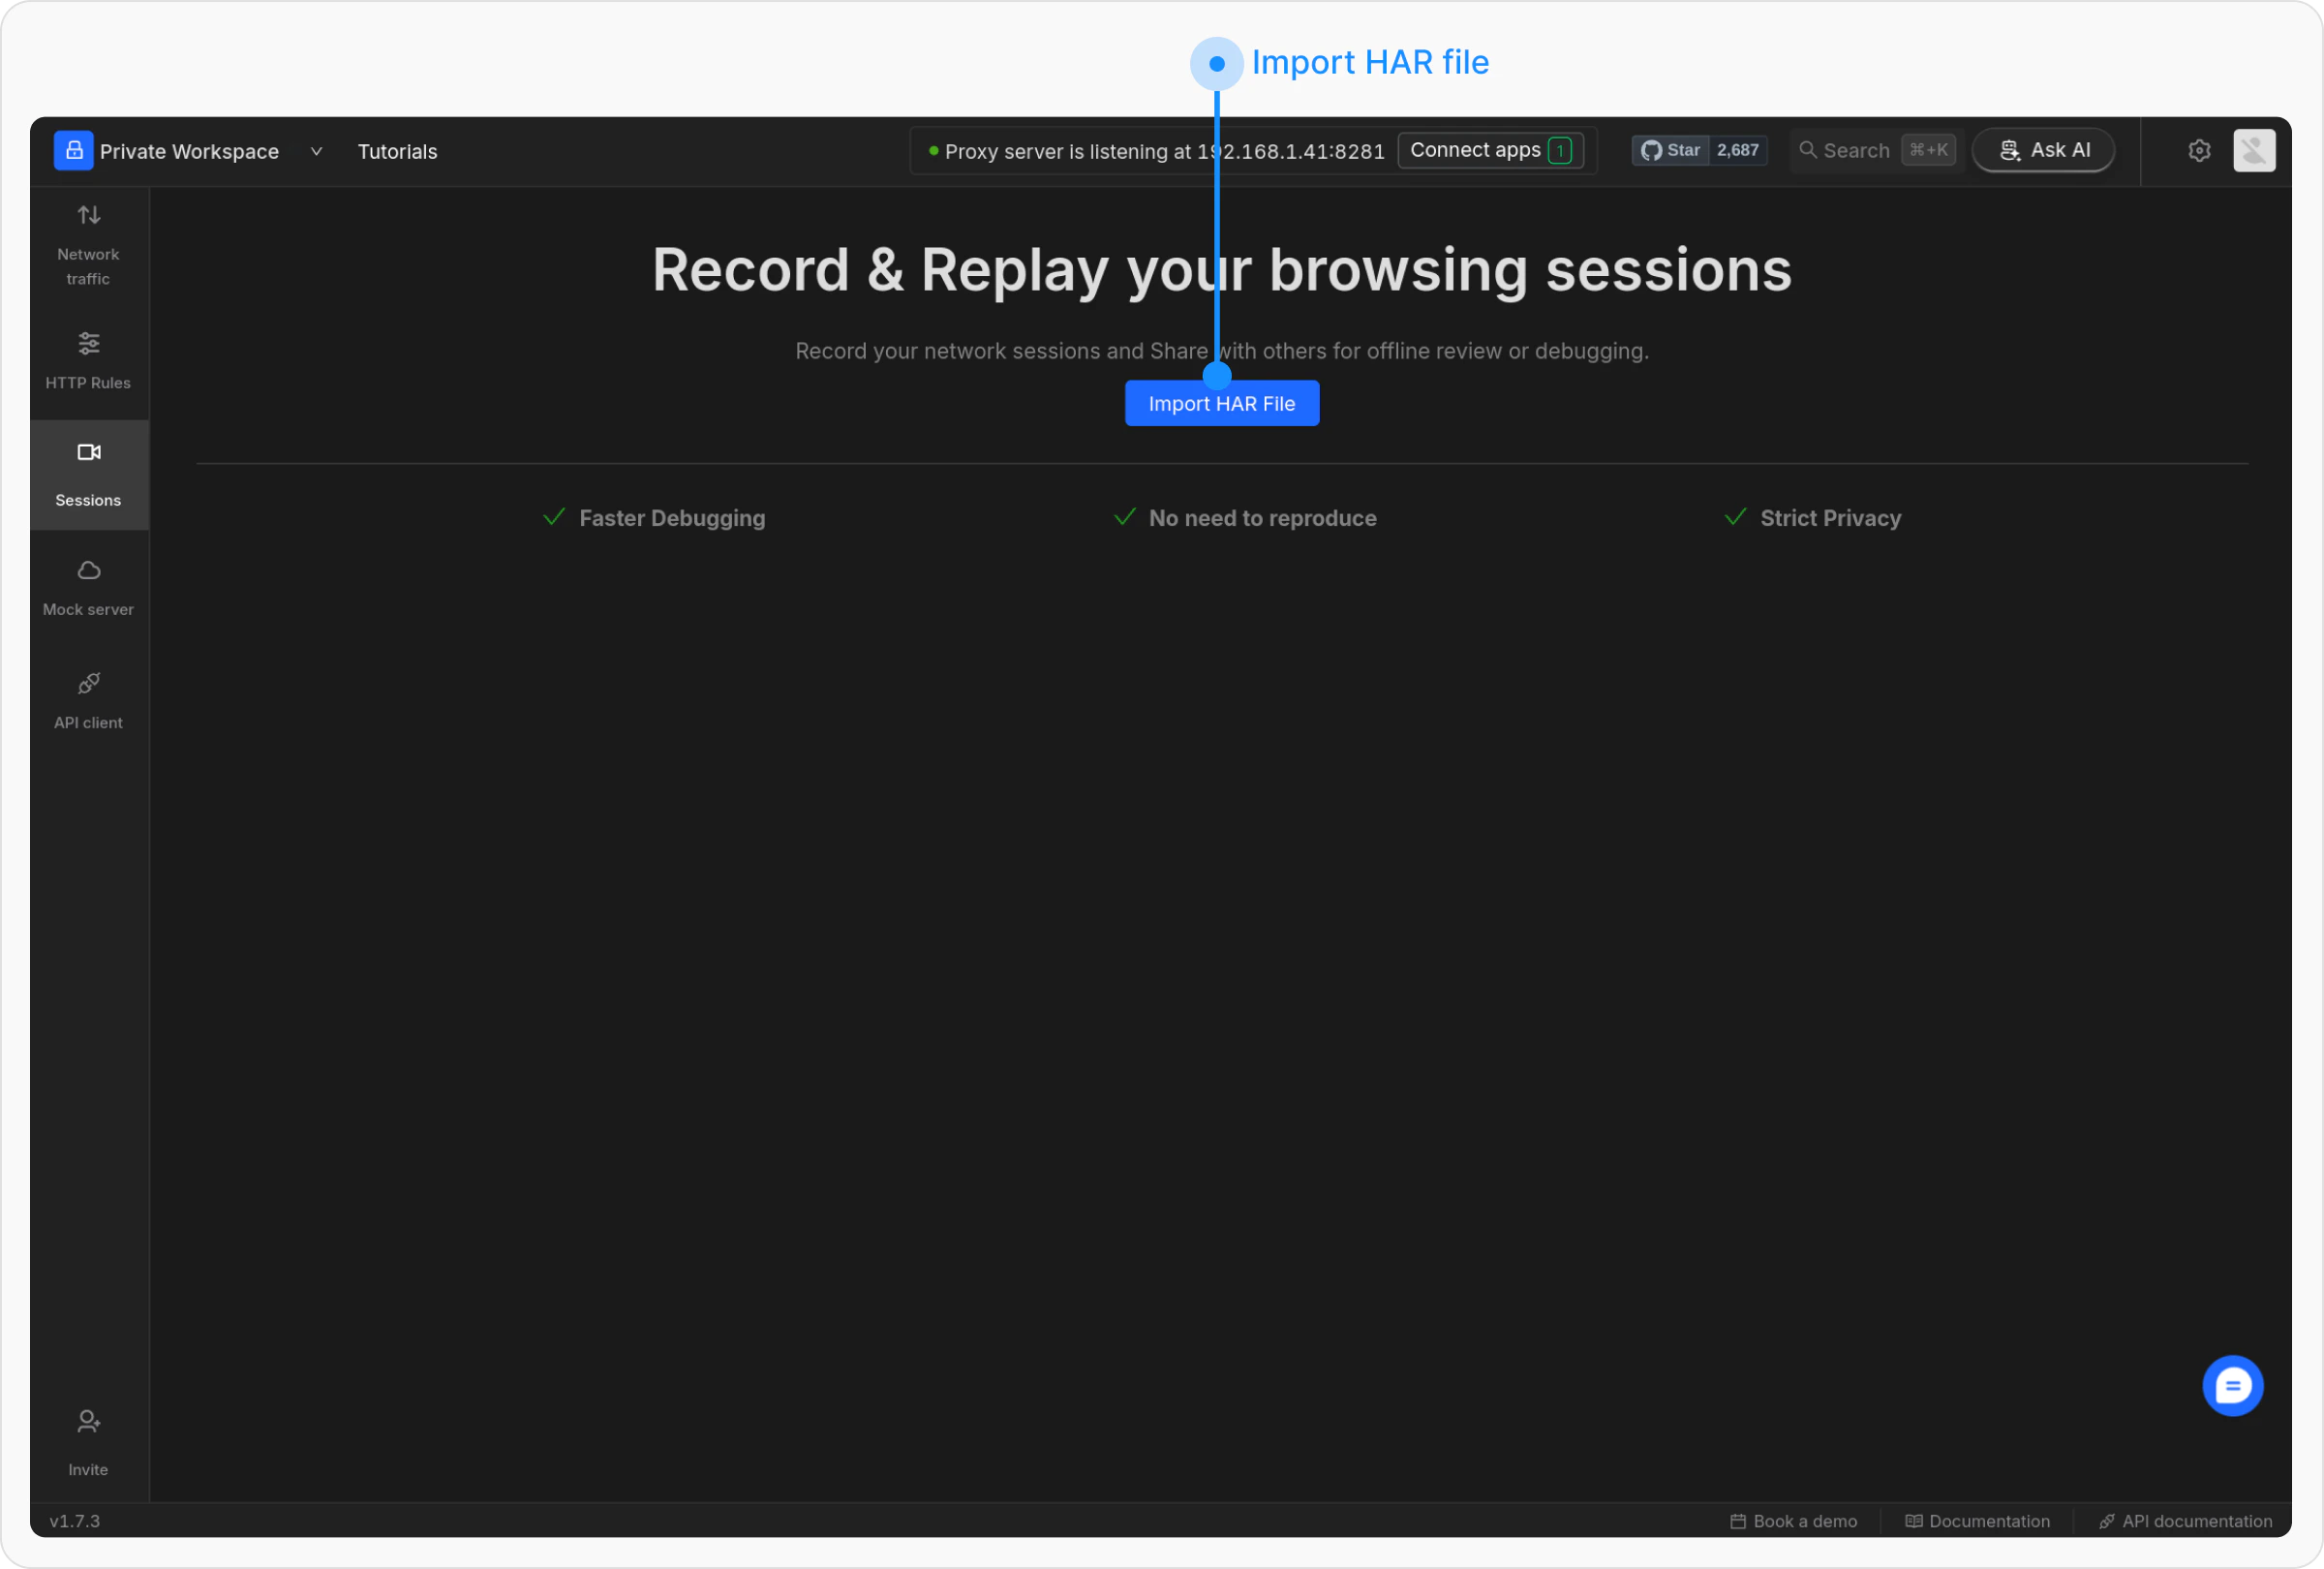 Once imported, you can start analyzing the session data.
### Import a .rqly File
Requestly Interceptor also supports importing its proprietary `.rqly` file format. This is useful for loading sessions captured from browser-based Sessions workflows.
Here's how:
Navigate to the desired session in the web app's Session and click **Download**.
Once imported, you can start analyzing the session data.
### Import a .rqly File
Requestly Interceptor also supports importing its proprietary `.rqly` file format. This is useful for loading sessions captured from browser-based Sessions workflows.
Here's how:
Navigate to the desired session in the web app's Session and click **Download**.
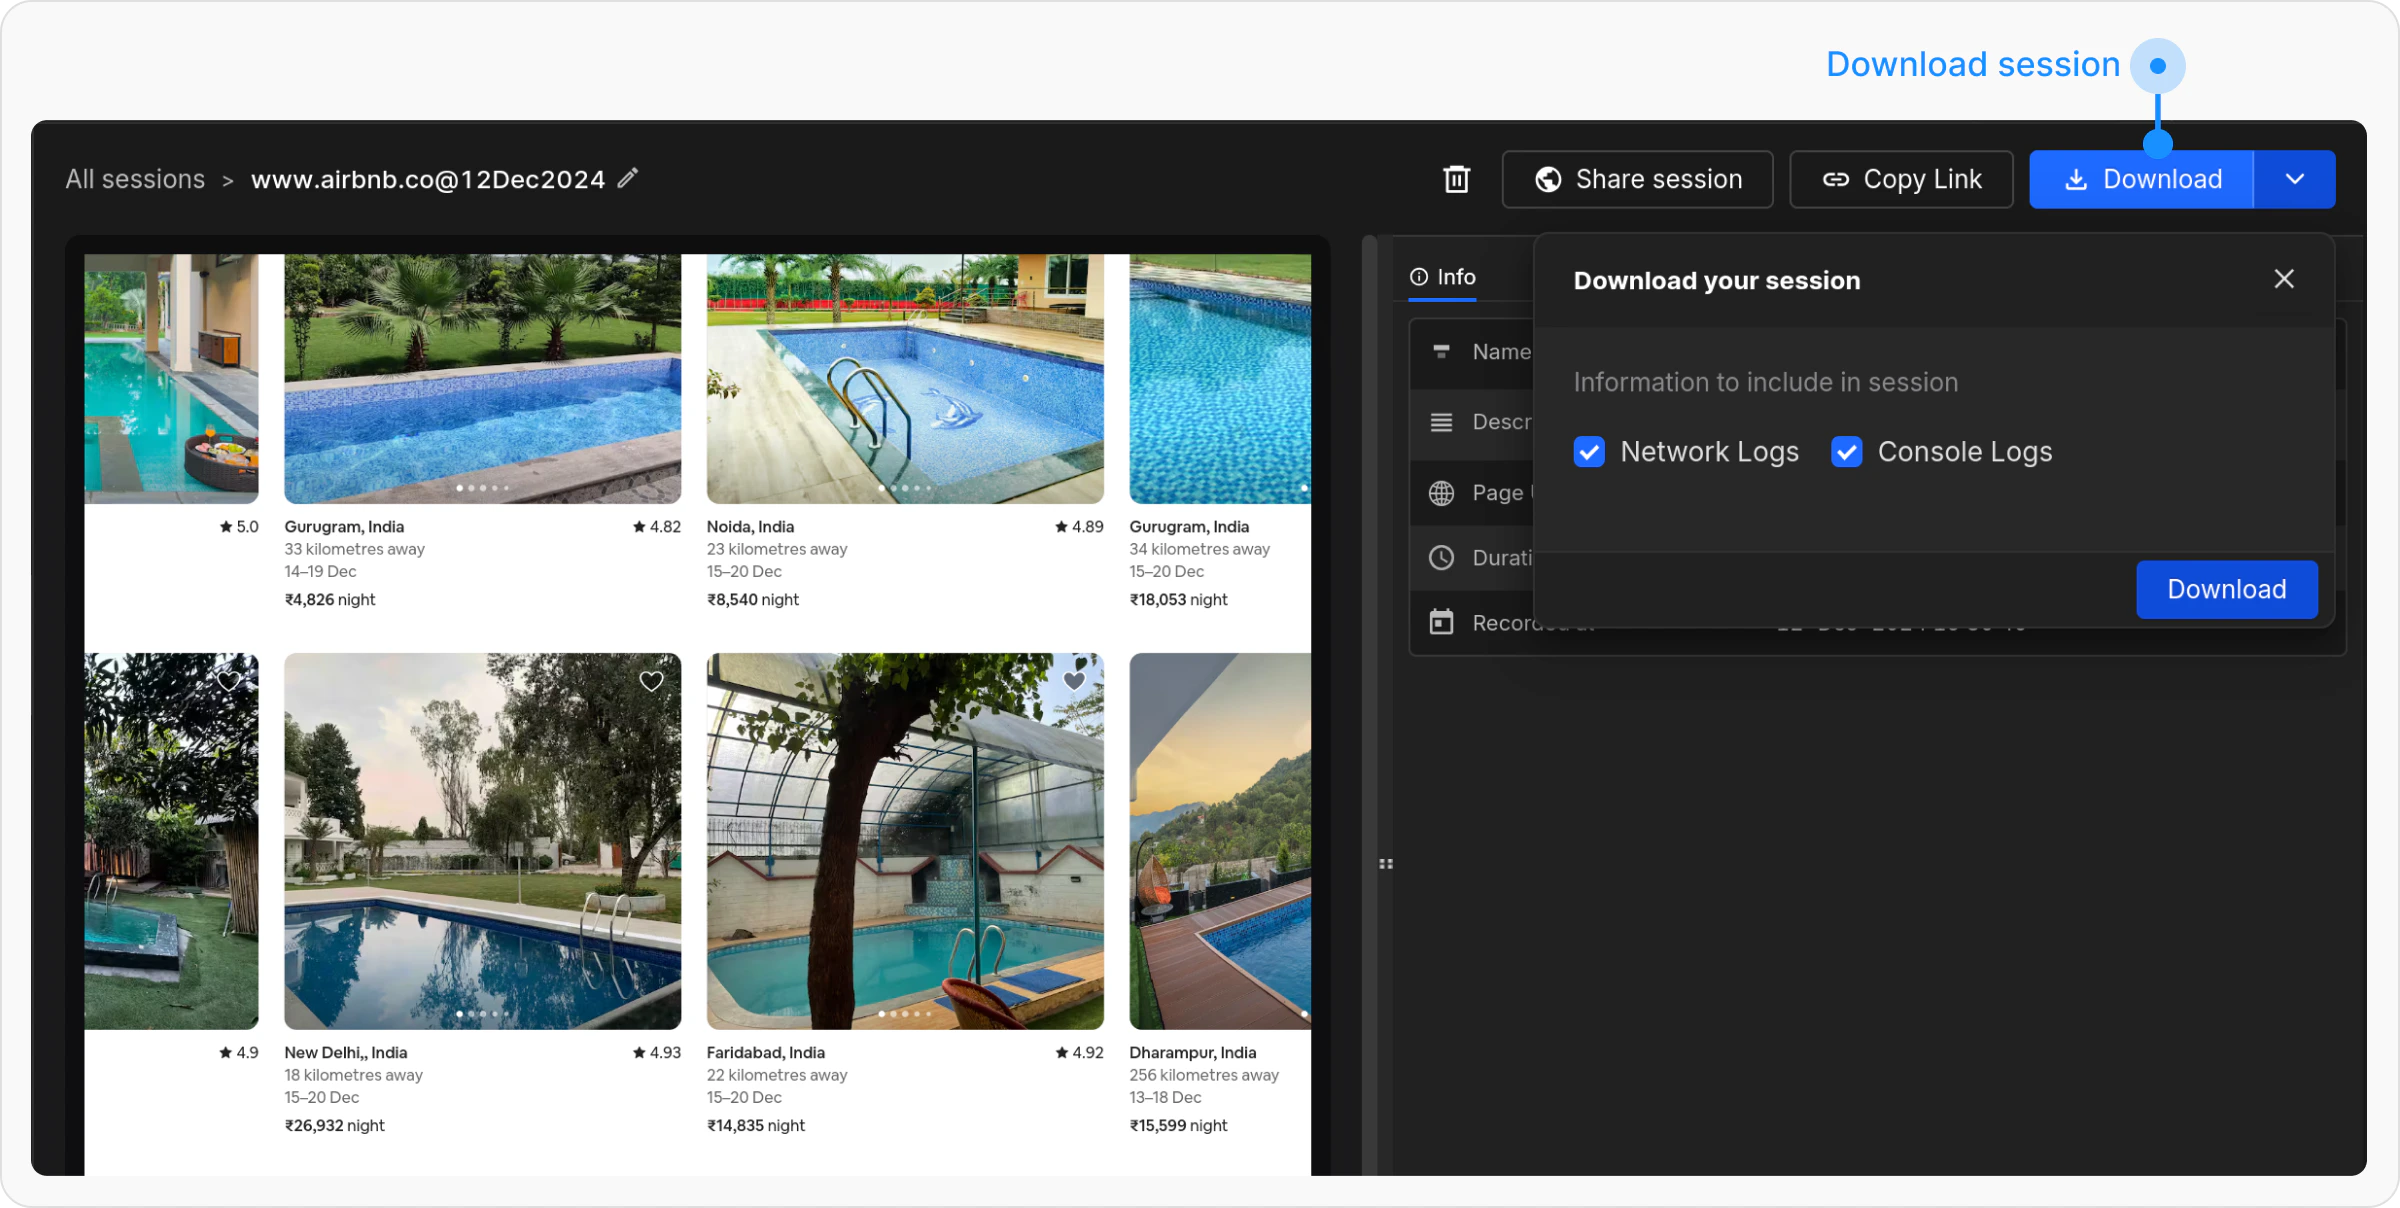 In the Requestly Interceptor Desktop App, click **Import .rqly File** and upload the downloaded file.
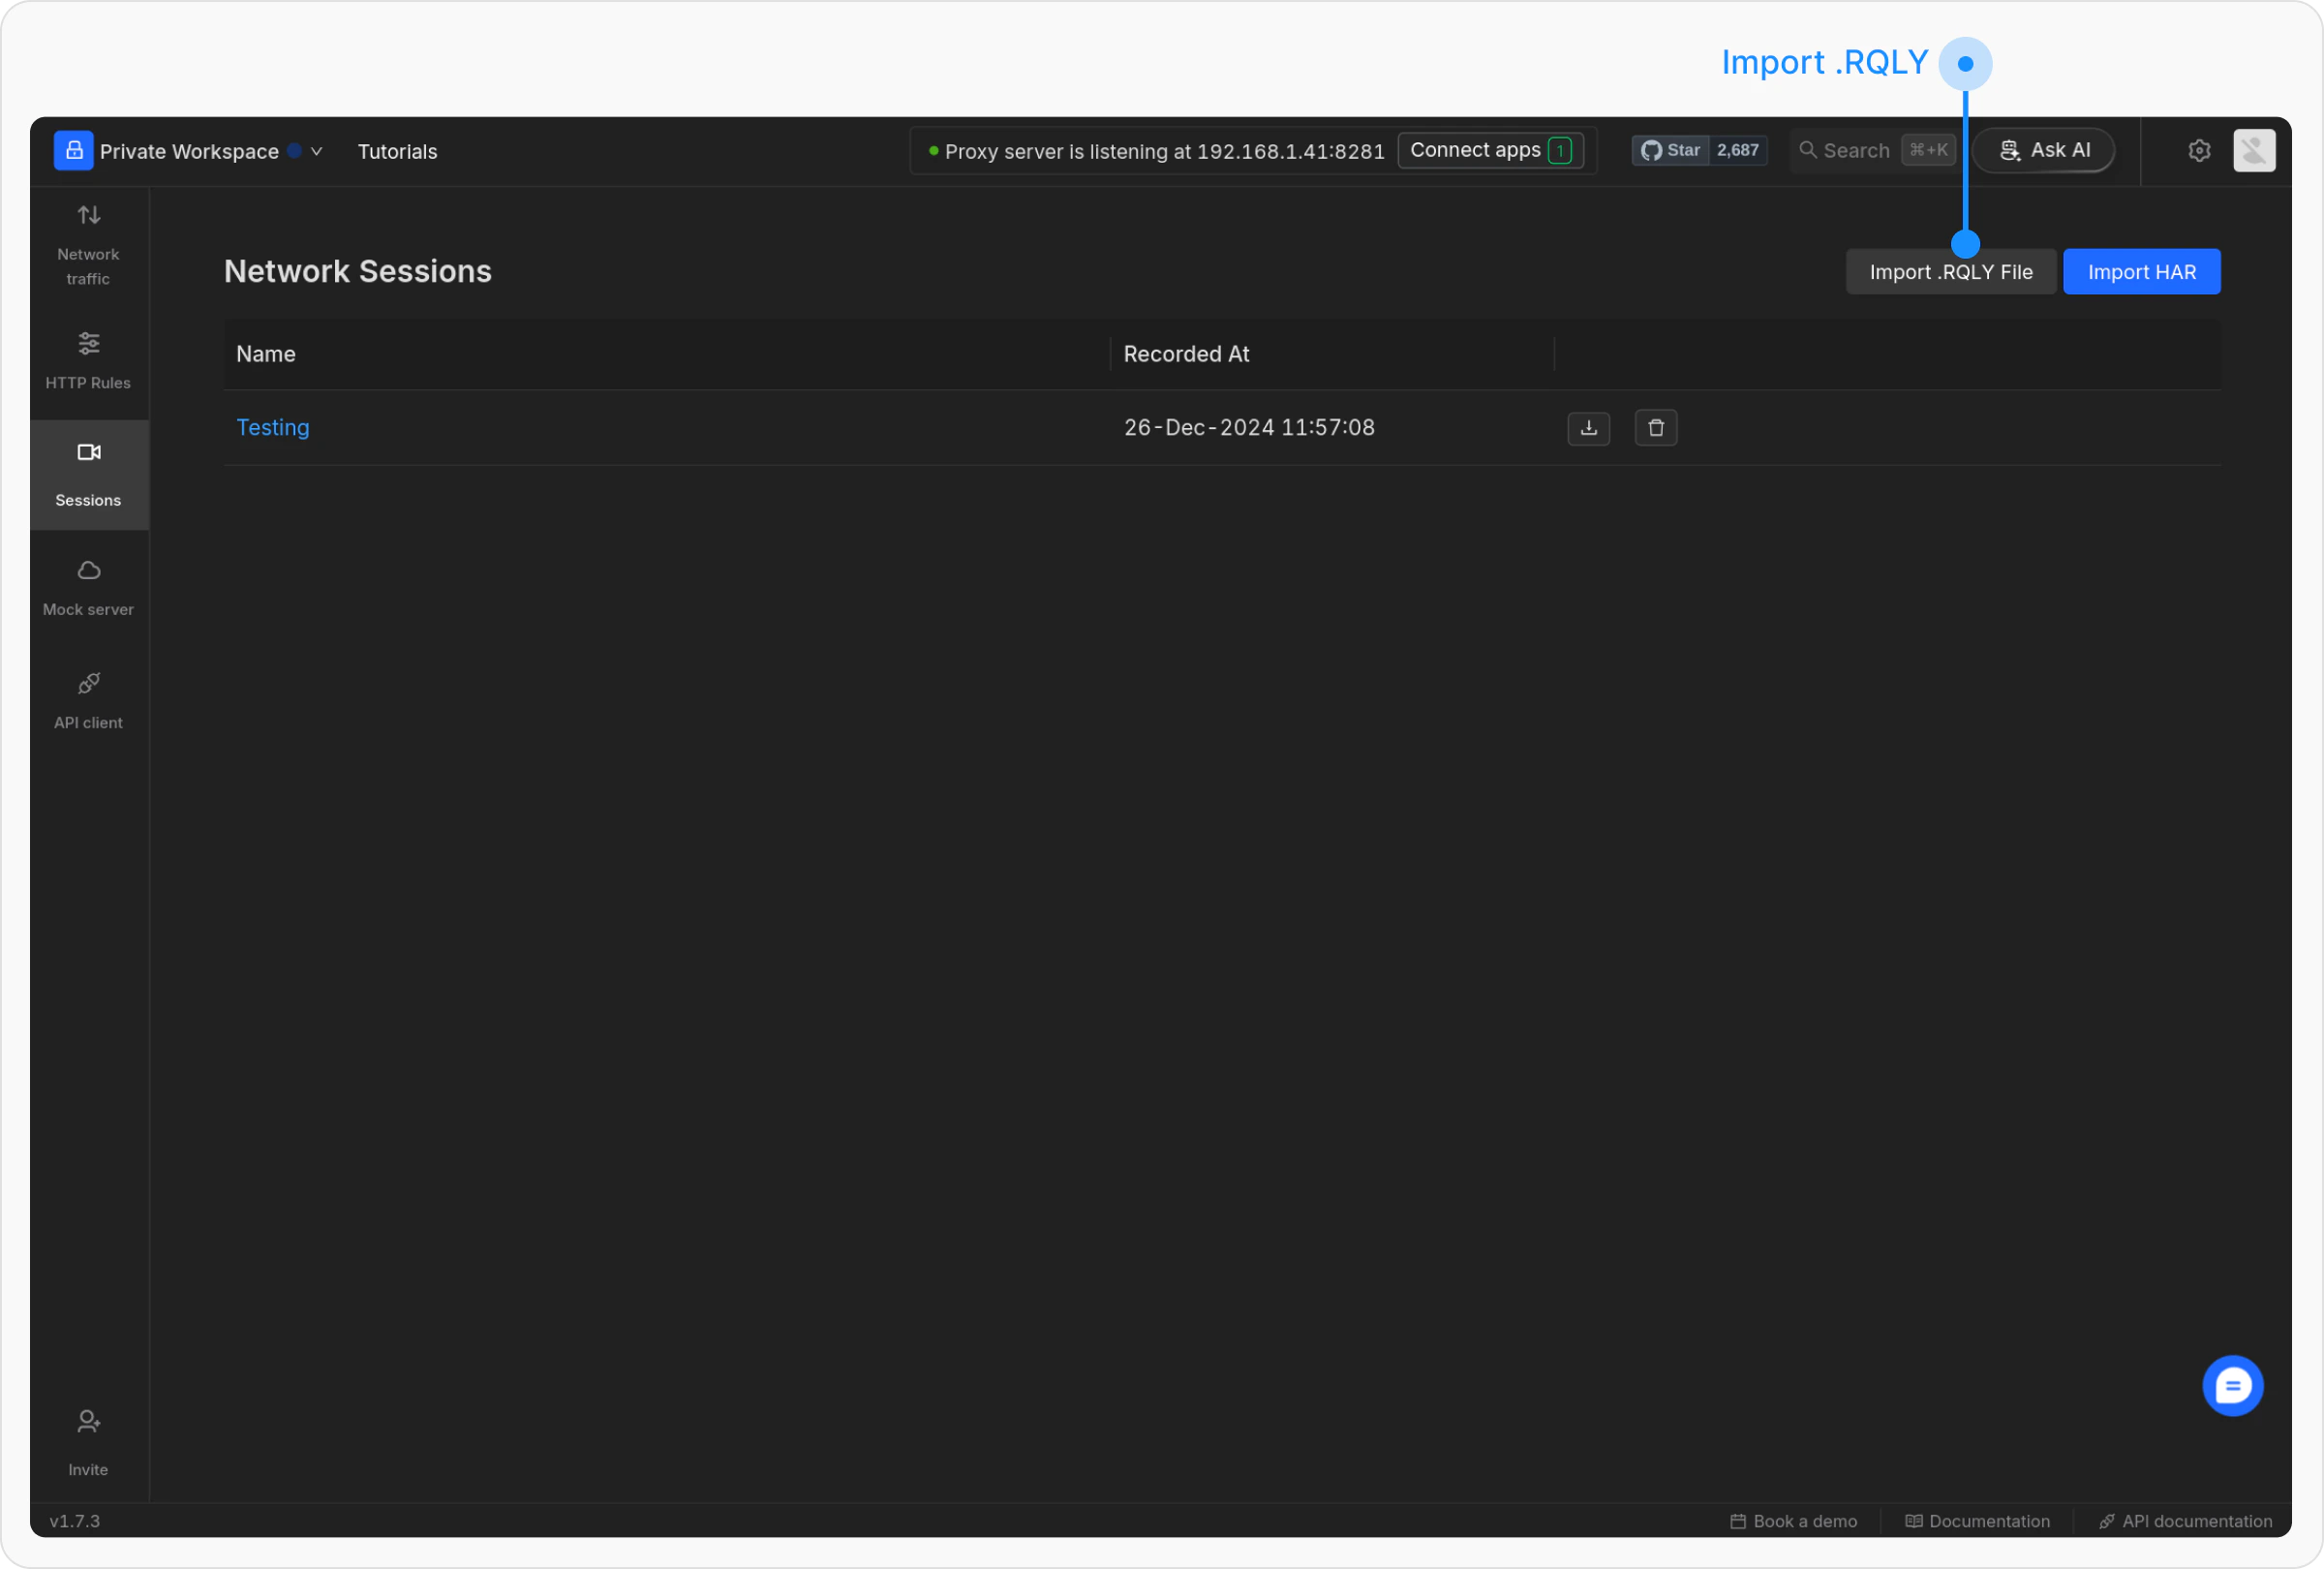 You can view the saved session later under the **Sessions** tab on the left side of the app.
***
## Session Interface
You can view the saved session later under the **Sessions** tab on the left side of the app.
***
## Session Interface
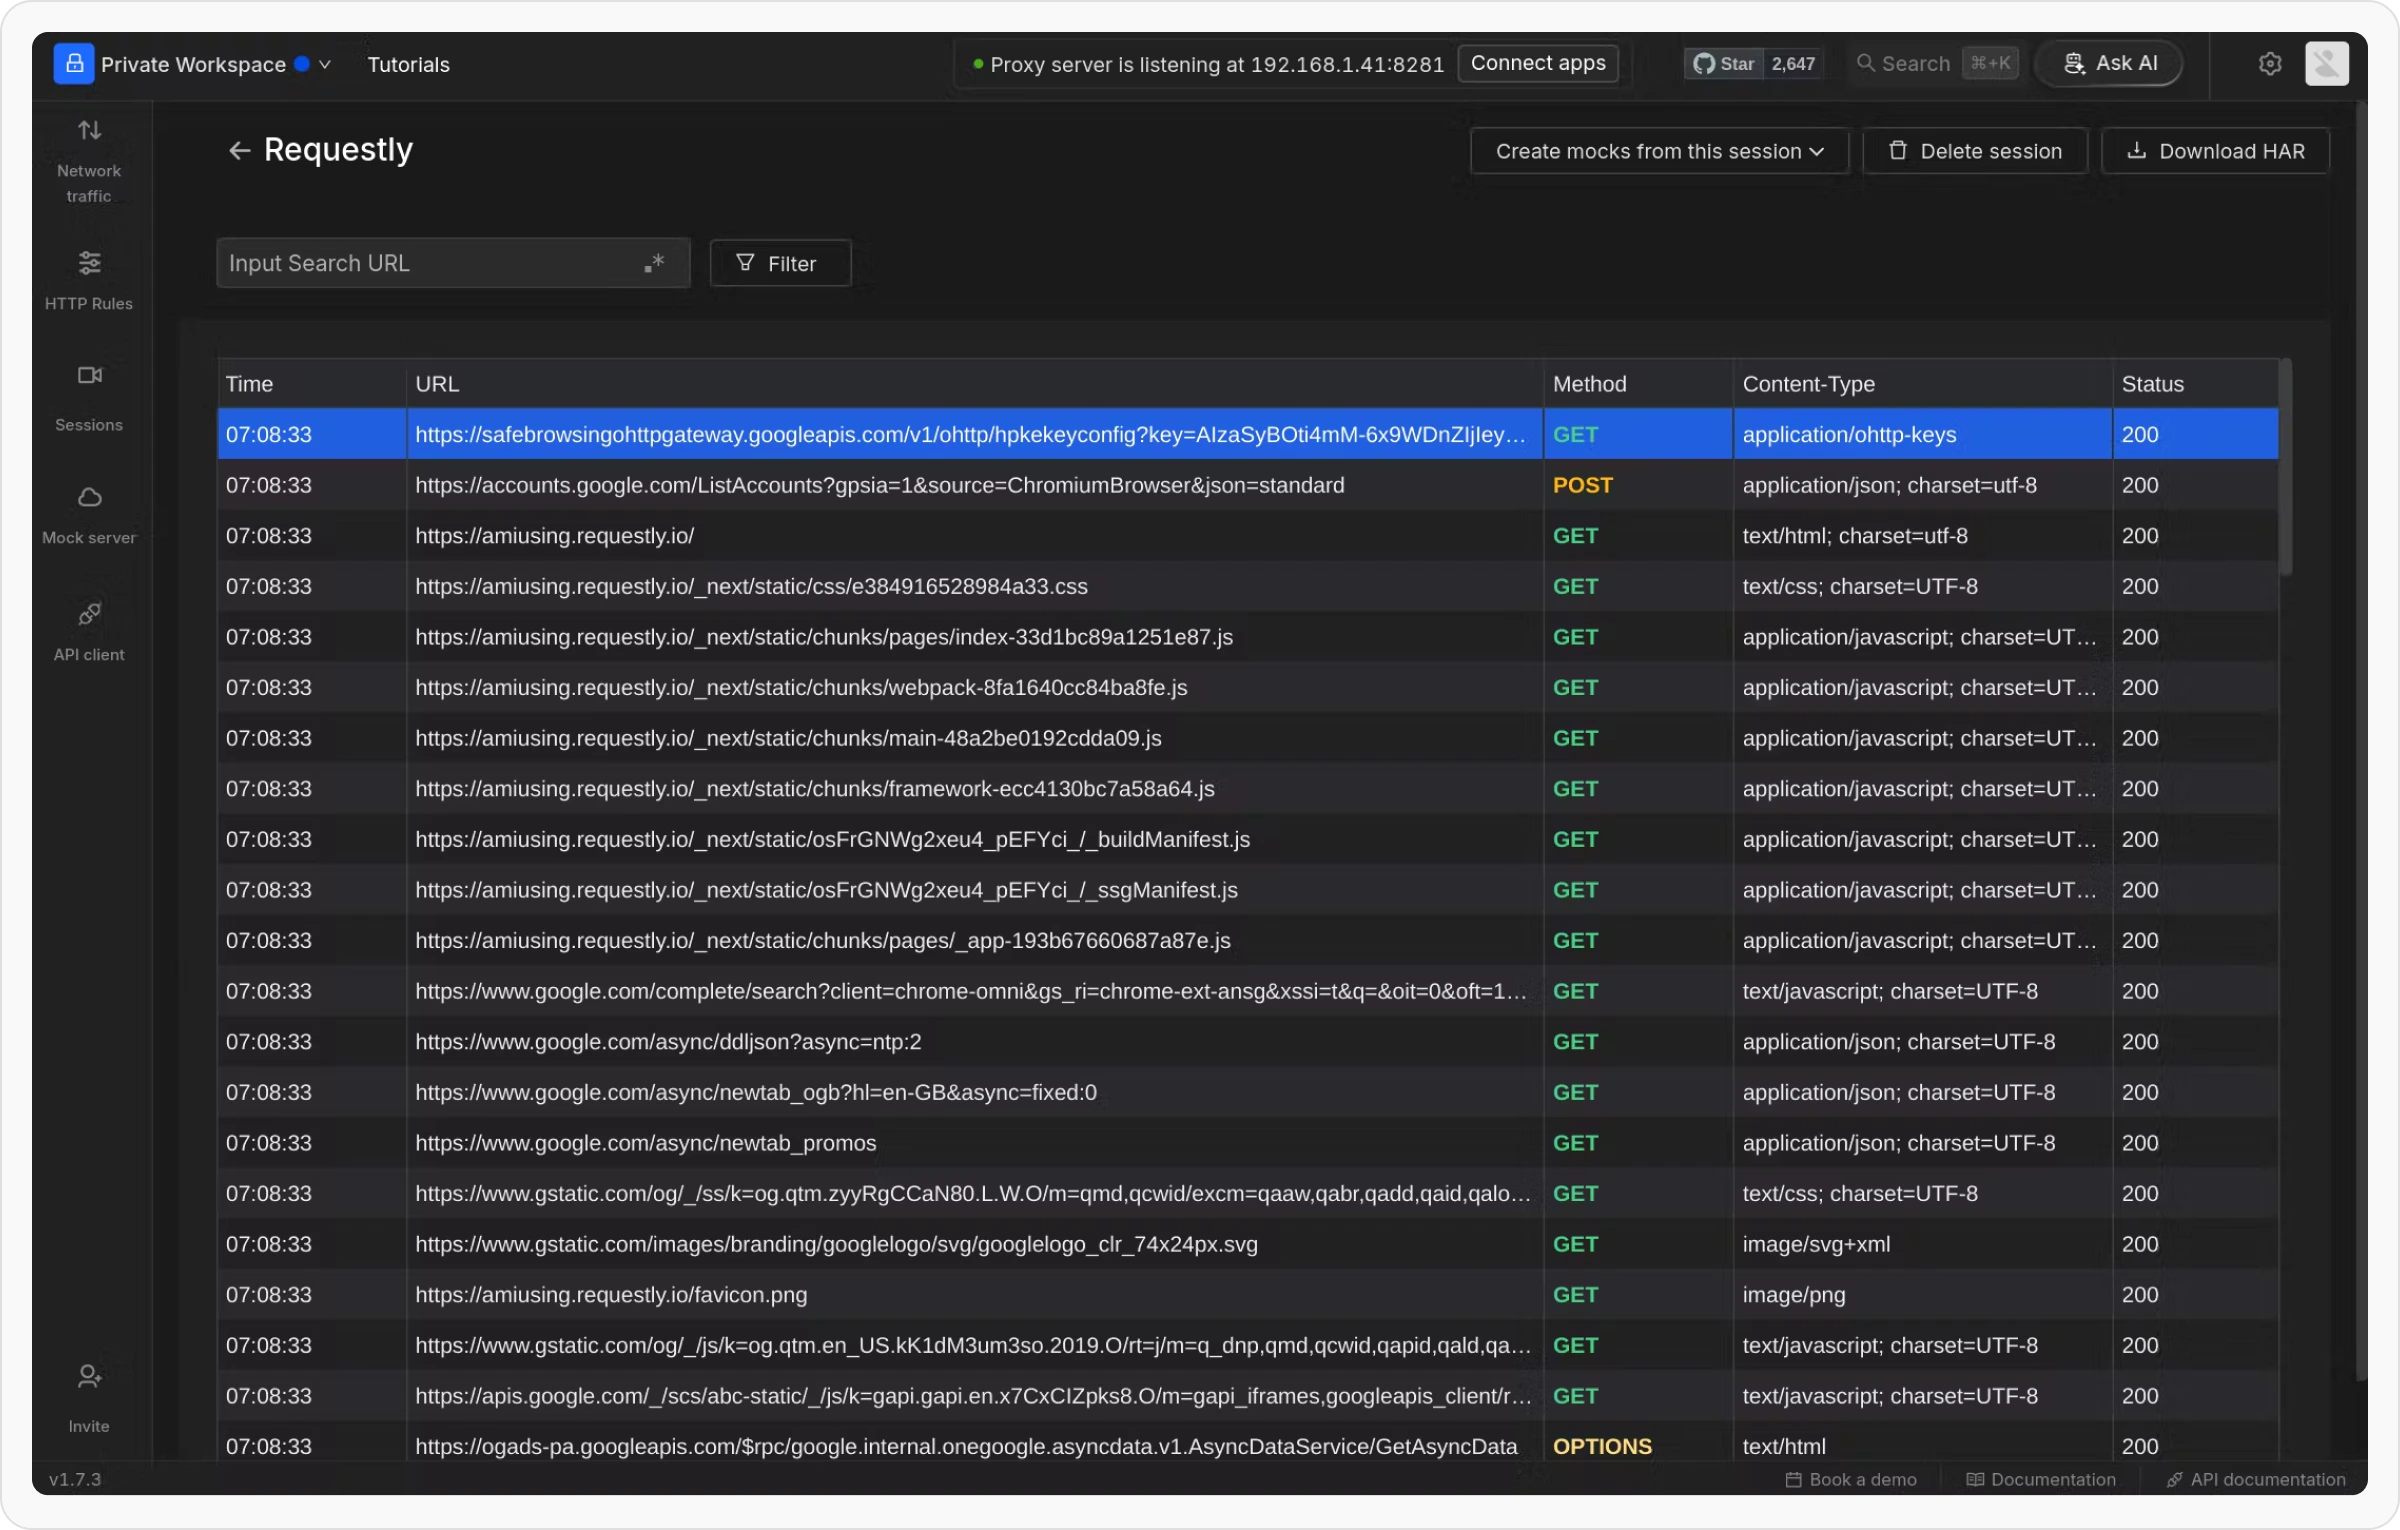 ### Search and Filters
 * **Search URL**: Look for specific requests by entering part of the URL, a wildcard, or a regular expression.
* **Filter by Method**: Narrow requests using HTTP methods like GET, POST, or PUT.
* **Filter by Status Code**: Filter responses by status codes (e.g., 200 for success, 404 for not found).
* **Filter by Resource Type**: Focus on resource types such as CSS files, JavaScript files, or images.
* **Modified Requests**: Check this box to see only requests altered by your applied rules.
* **Clear All**: Reset all filters to view the full list of requests.
### Traffic Table
* **Search URL**: Look for specific requests by entering part of the URL, a wildcard, or a regular expression.
* **Filter by Method**: Narrow requests using HTTP methods like GET, POST, or PUT.
* **Filter by Status Code**: Filter responses by status codes (e.g., 200 for success, 404 for not found).
* **Filter by Resource Type**: Focus on resource types such as CSS files, JavaScript files, or images.
* **Modified Requests**: Check this box to see only requests altered by your applied rules.
* **Clear All**: Reset all filters to view the full list of requests.
### Traffic Table
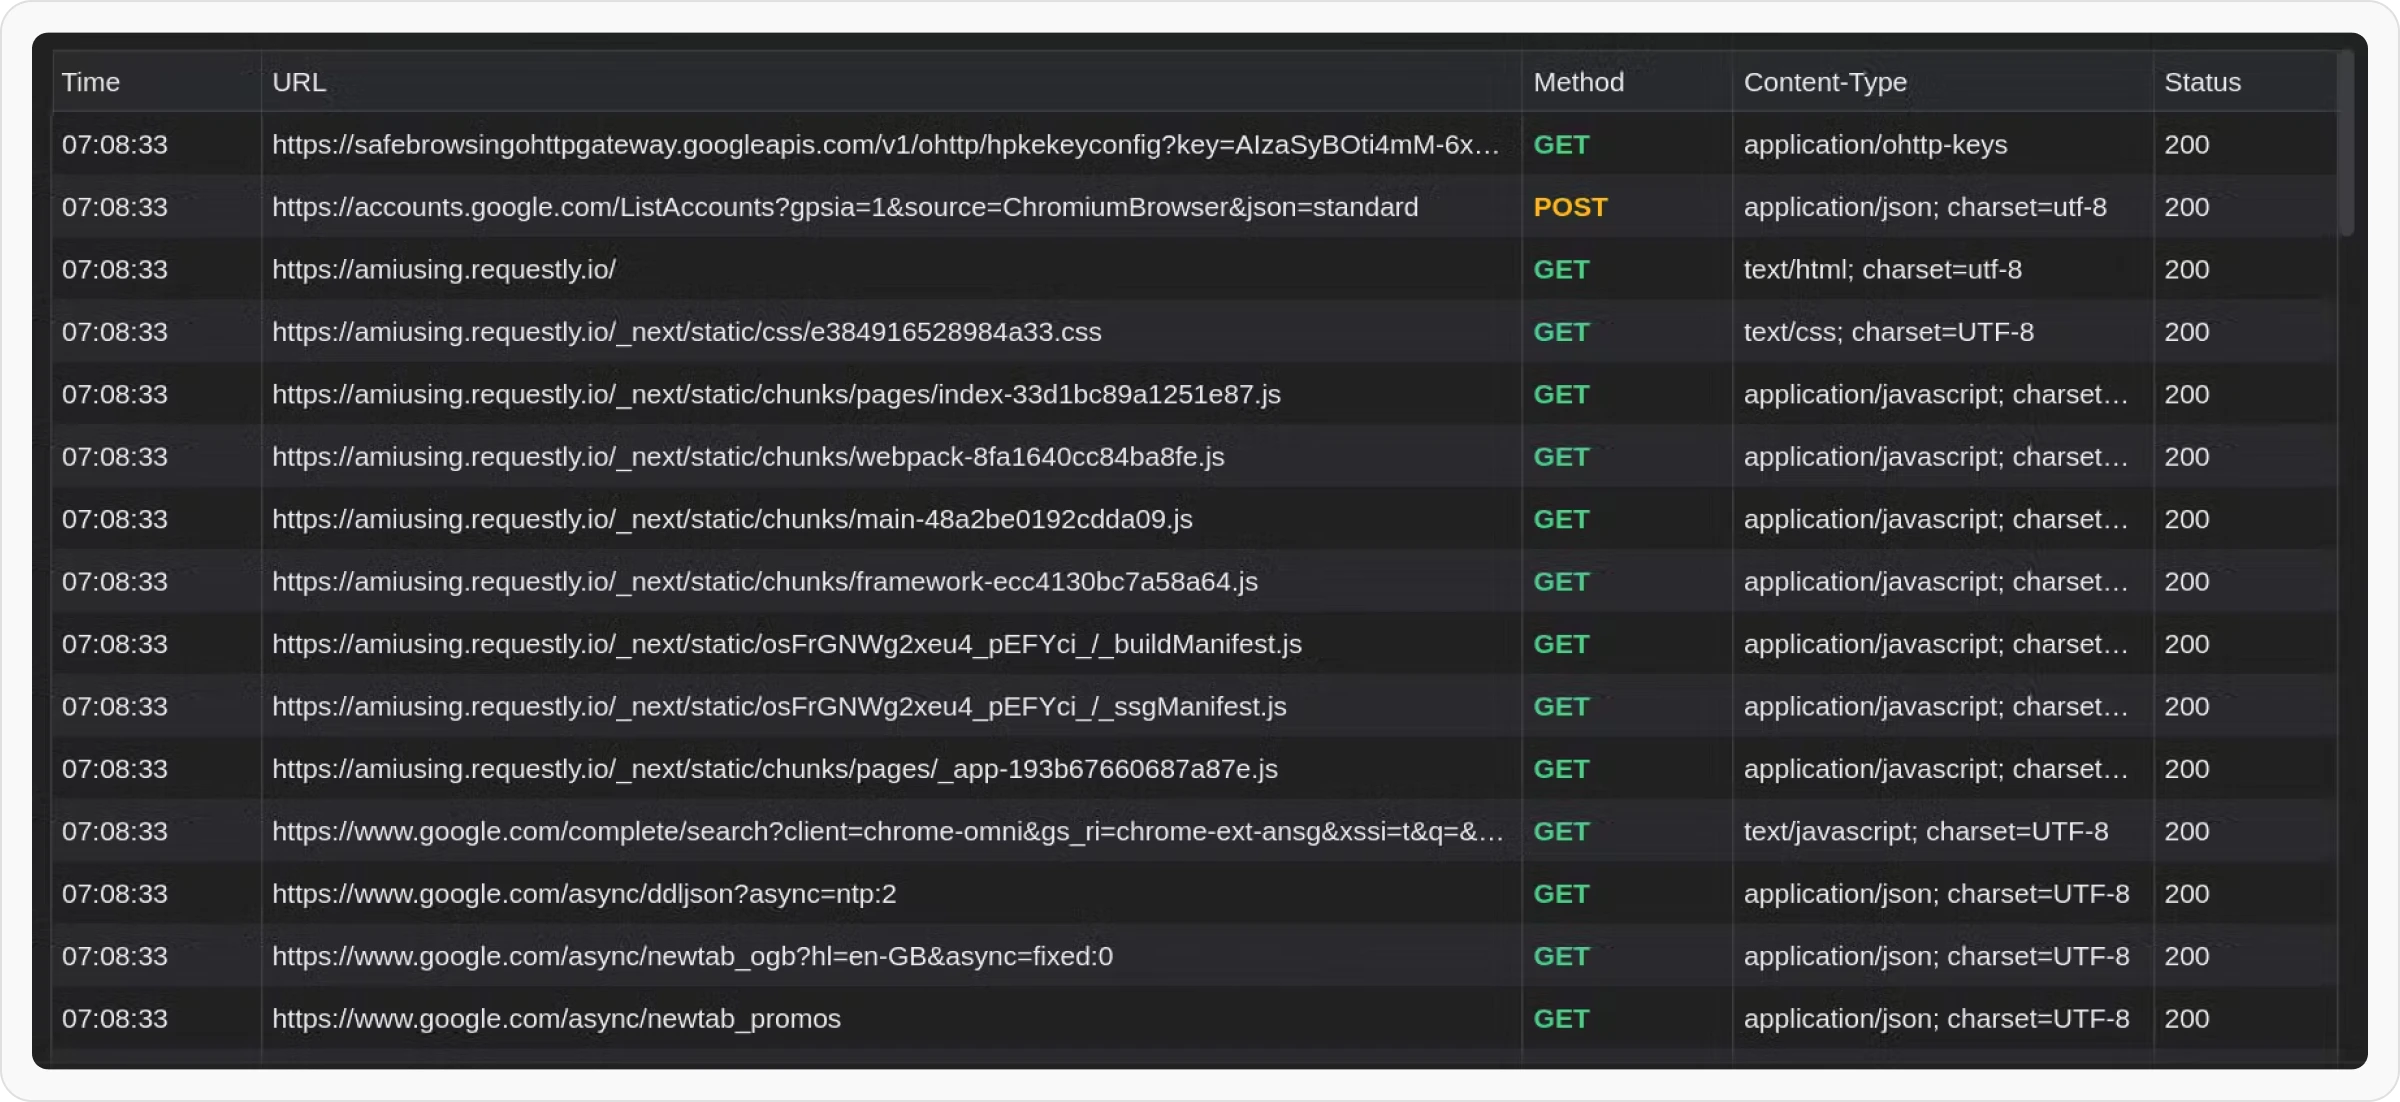 The main table provides a detailed overview of network requests, including:
* **Time**: The timestamp of each request.
* **URL**: The accessed URLs for better visibility into endpoints.
* **Method**: The HTTP method used (e.g., GET, POST).
* **Content-Type**: The type of content being transmitted (e.g., `text/css`, `application/json`).
* **Status**: The HTTP response status code (e.g., 200, 404).
### Details Section (Bottom Panel)
The main table provides a detailed overview of network requests, including:
* **Time**: The timestamp of each request.
* **URL**: The accessed URLs for better visibility into endpoints.
* **Method**: The HTTP method used (e.g., GET, POST).
* **Content-Type**: The type of content being transmitted (e.g., `text/css`, `application/json`).
* **Status**: The HTTP response status code (e.g., 200, 404).
### Details Section (Bottom Panel)
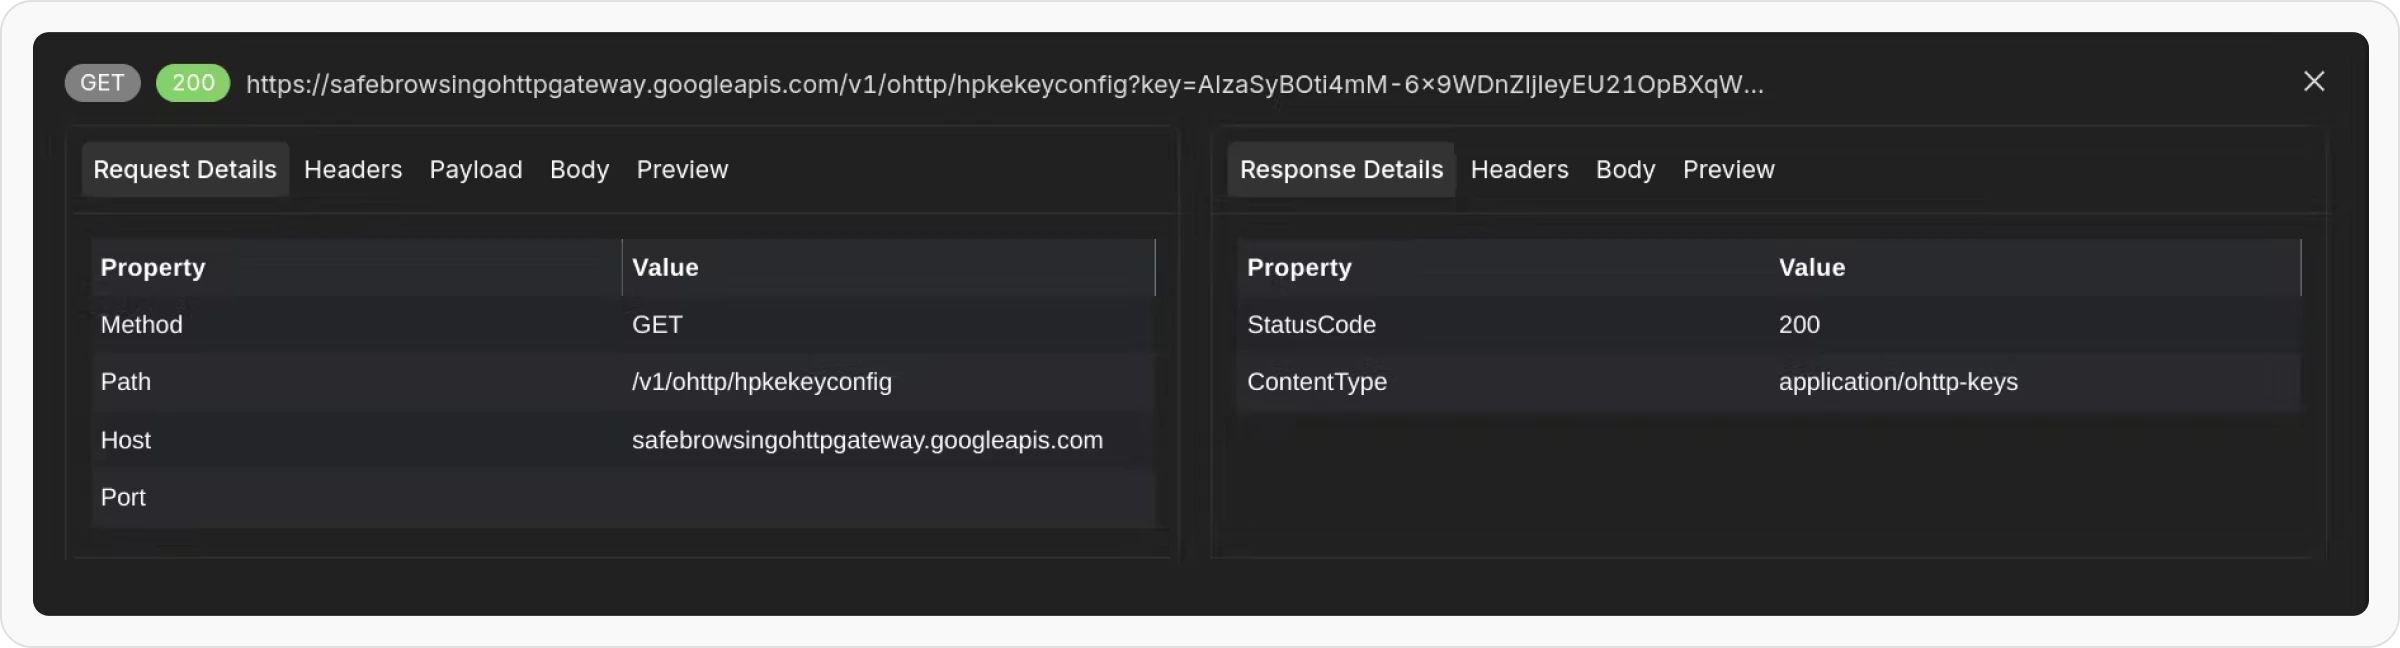 The bottom panel provides detailed information about selected requests, including
* **Request Details**: View the HTTP method, path, host, and port.
* **Headers**: Inspect request and response headers.
* **Payload**: Check data sent with the request (e.g., for POST requests).
* **Body**: Examine the response body.
* **Preview**: Render response content, such as HTML or CSS, if applicable
### Action Buttons
* **Create Mocks**: Simulate backend responses for testing and development without relying on an actual server. You can also perform **bulk mocking** to create multiple mock responses at once, streamlining the testing process.
* **Delete Sessions**: Remove old or unnecessary sessions to keep your workflow organized.
* **Download HAR Files**: Export HTTP Archive (HAR) files to analyze network activity and debug issues easily.
## Additional Features
### Bulk Mocking
Create multiple mock responses at once to save time and simplify your testing. This feature lets you simulate different backend scenarios, speeding up both development and testing.
With Bulk Mocking, you can quickly create mock responses for selected requests in a session, streamlining your workflow. Once your mocks are created, you can view and manage them easily.
For more detailed instructions, check out our Bulk Mocking Guide.
### Saving and Sharing Sessions
You can keep your session data for later use or **share it** with others. Use the **Export HAR** option to download session data, which can be shared or re-imported into Requestly Interceptor. To learn more, visit the **Import/View HAR file page**.
### Creating Rules from Captured Sessions
Requestly Interceptor allows you to use captured sessions to create rules tailored to specific testing scenarios. This method helps replicate real-world conditions effectively. Here's how you can leverage sessions to define rules:
**Popular Use Cases**
* **Redirect Requests:** Create rules to reroute specific URLs to alternative endpoints for testing purposes.
* **Modify Headers:** Adjust request or response headers to simulate various environments or configurations.
* **Delay Responses:** Introduce network delays to observe how your app handles slow response times.
Here’s how to create a Rule from Captured Sessions:
Open Your Session and Right-click any request from the traffic table.
Choose a rule type (e.g., Redirect URL, Modify Header).
The bottom panel provides detailed information about selected requests, including
* **Request Details**: View the HTTP method, path, host, and port.
* **Headers**: Inspect request and response headers.
* **Payload**: Check data sent with the request (e.g., for POST requests).
* **Body**: Examine the response body.
* **Preview**: Render response content, such as HTML or CSS, if applicable
### Action Buttons
* **Create Mocks**: Simulate backend responses for testing and development without relying on an actual server. You can also perform **bulk mocking** to create multiple mock responses at once, streamlining the testing process.
* **Delete Sessions**: Remove old or unnecessary sessions to keep your workflow organized.
* **Download HAR Files**: Export HTTP Archive (HAR) files to analyze network activity and debug issues easily.
## Additional Features
### Bulk Mocking
Create multiple mock responses at once to save time and simplify your testing. This feature lets you simulate different backend scenarios, speeding up both development and testing.
With Bulk Mocking, you can quickly create mock responses for selected requests in a session, streamlining your workflow. Once your mocks are created, you can view and manage them easily.
For more detailed instructions, check out our Bulk Mocking Guide.
### Saving and Sharing Sessions
You can keep your session data for later use or **share it** with others. Use the **Export HAR** option to download session data, which can be shared or re-imported into Requestly Interceptor. To learn more, visit the **Import/View HAR file page**.
### Creating Rules from Captured Sessions
Requestly Interceptor allows you to use captured sessions to create rules tailored to specific testing scenarios. This method helps replicate real-world conditions effectively. Here's how you can leverage sessions to define rules:
**Popular Use Cases**
* **Redirect Requests:** Create rules to reroute specific URLs to alternative endpoints for testing purposes.
* **Modify Headers:** Adjust request or response headers to simulate various environments or configurations.
* **Delay Responses:** Introduce network delays to observe how your app handles slow response times.
Here’s how to create a Rule from Captured Sessions:
Open Your Session and Right-click any request from the traffic table.
Choose a rule type (e.g., Redirect URL, Modify Header).
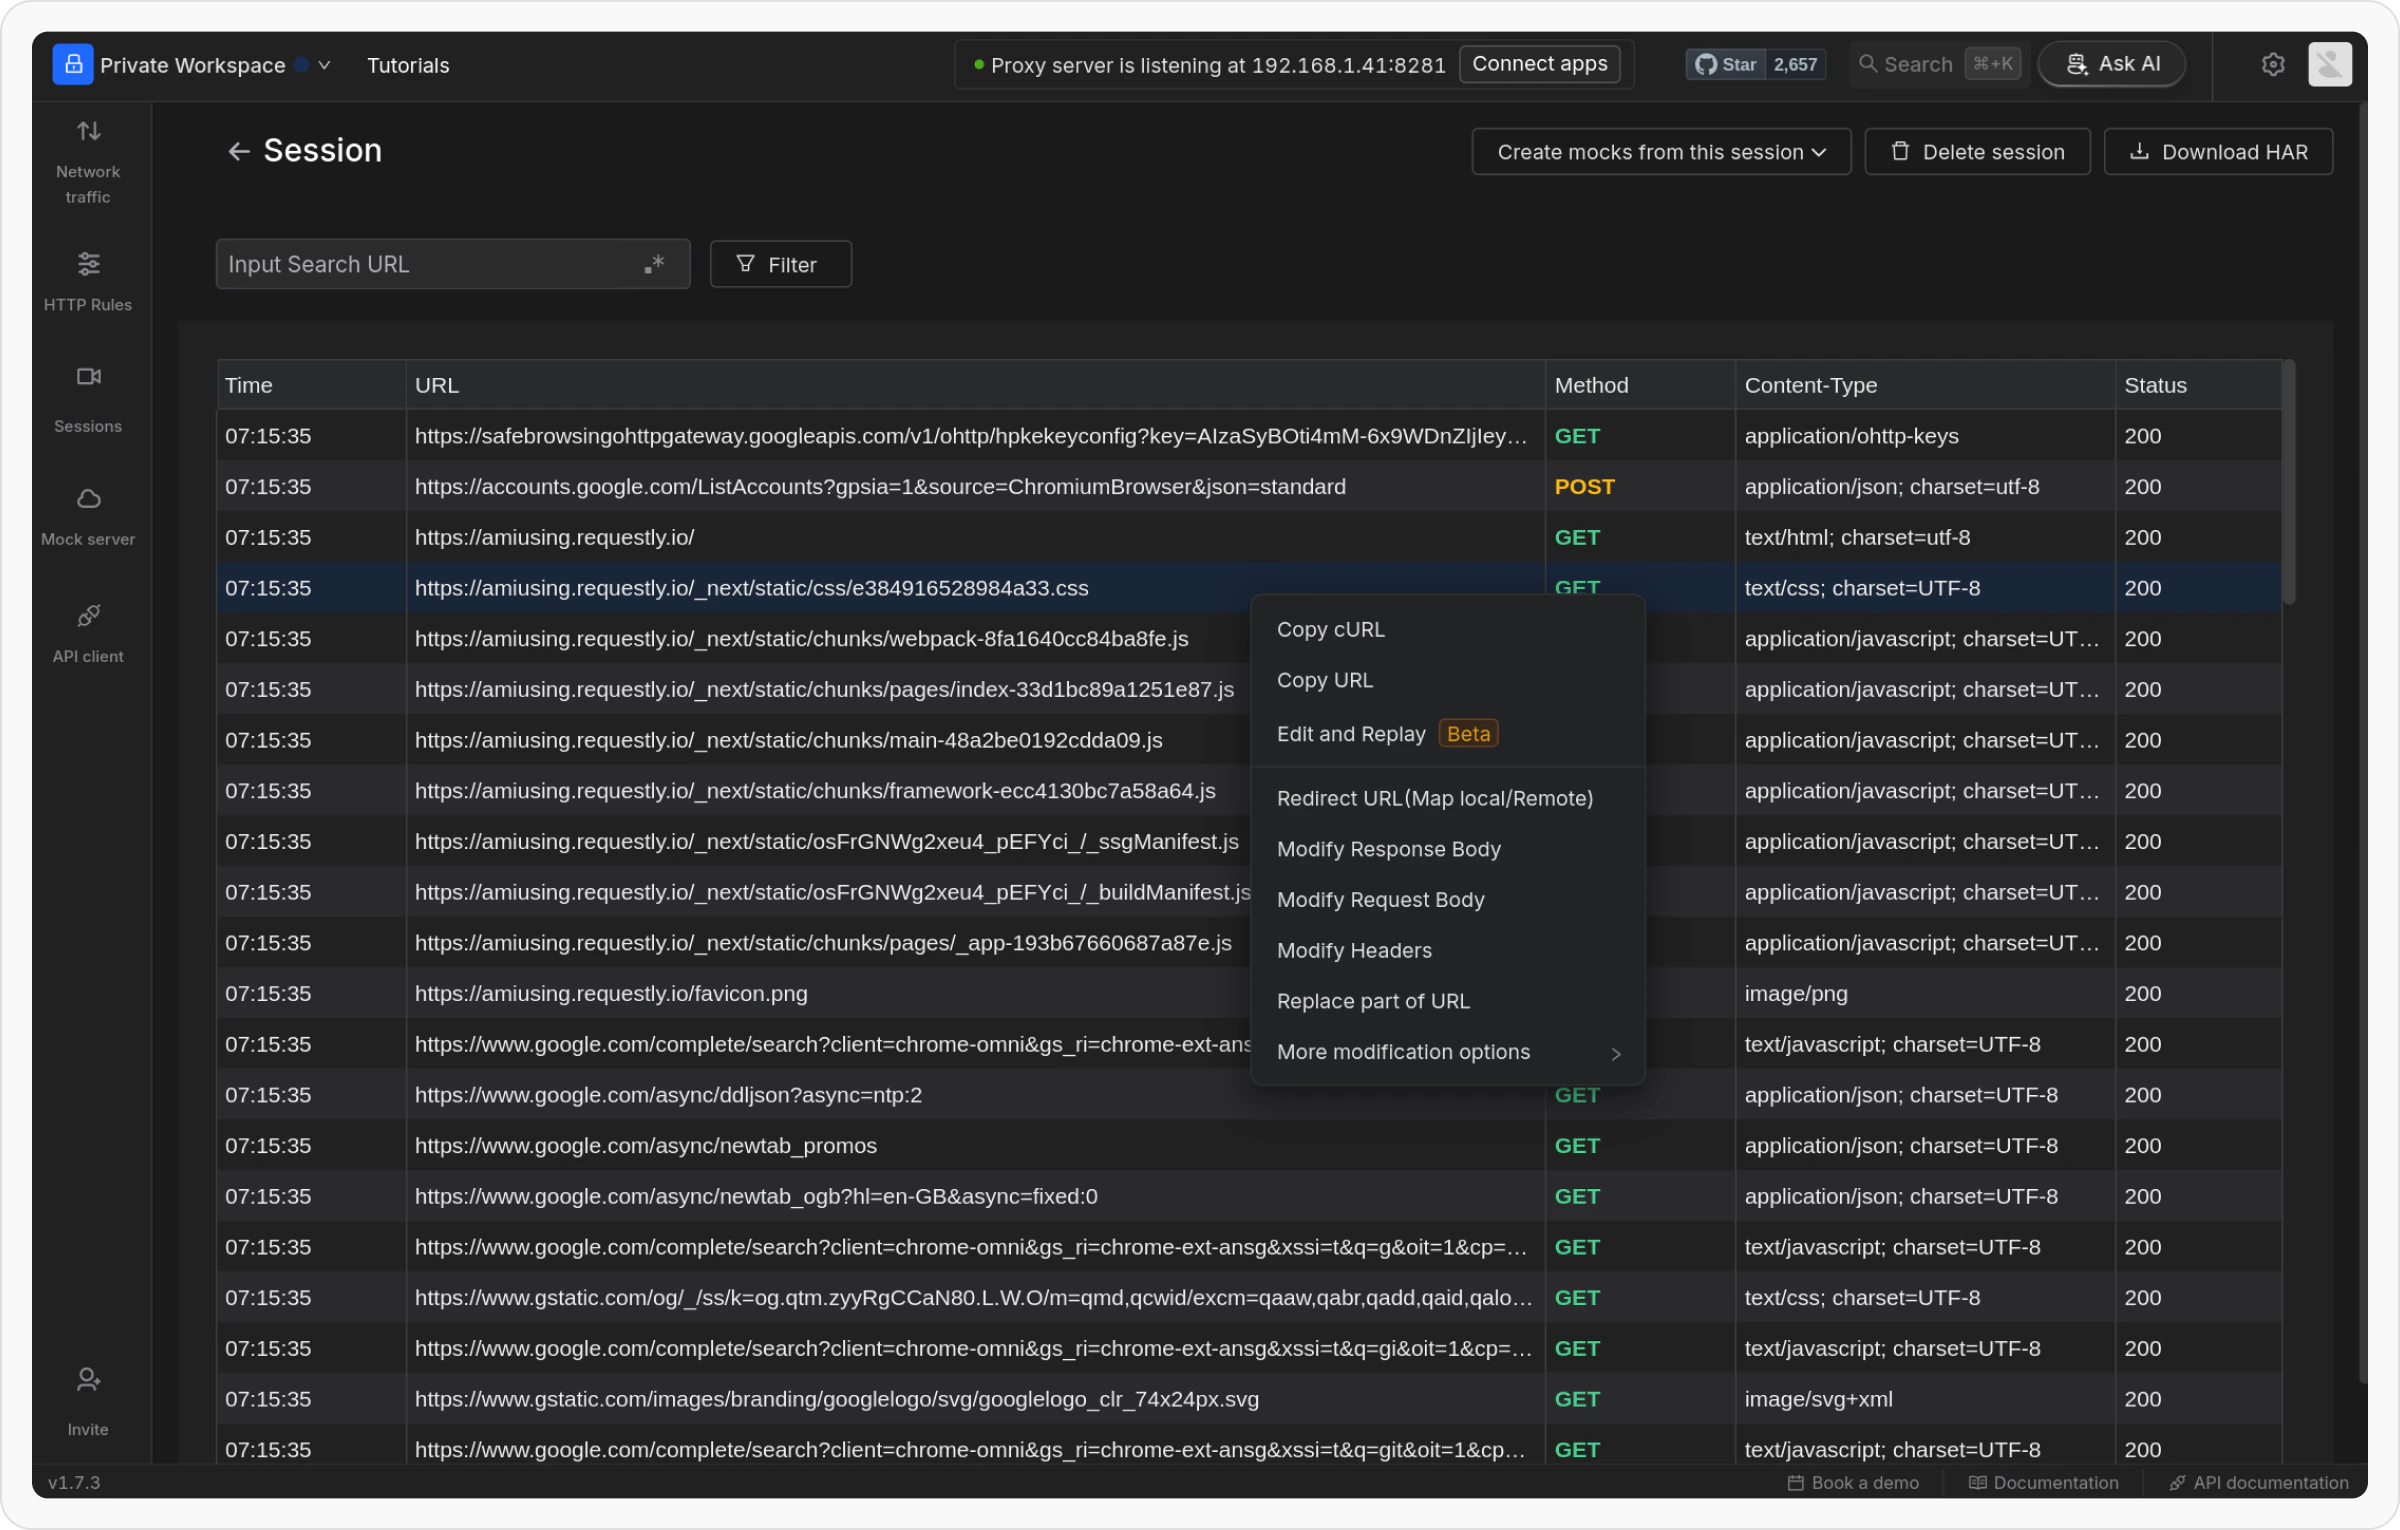 Configure the rule as needed for your testing scenario.
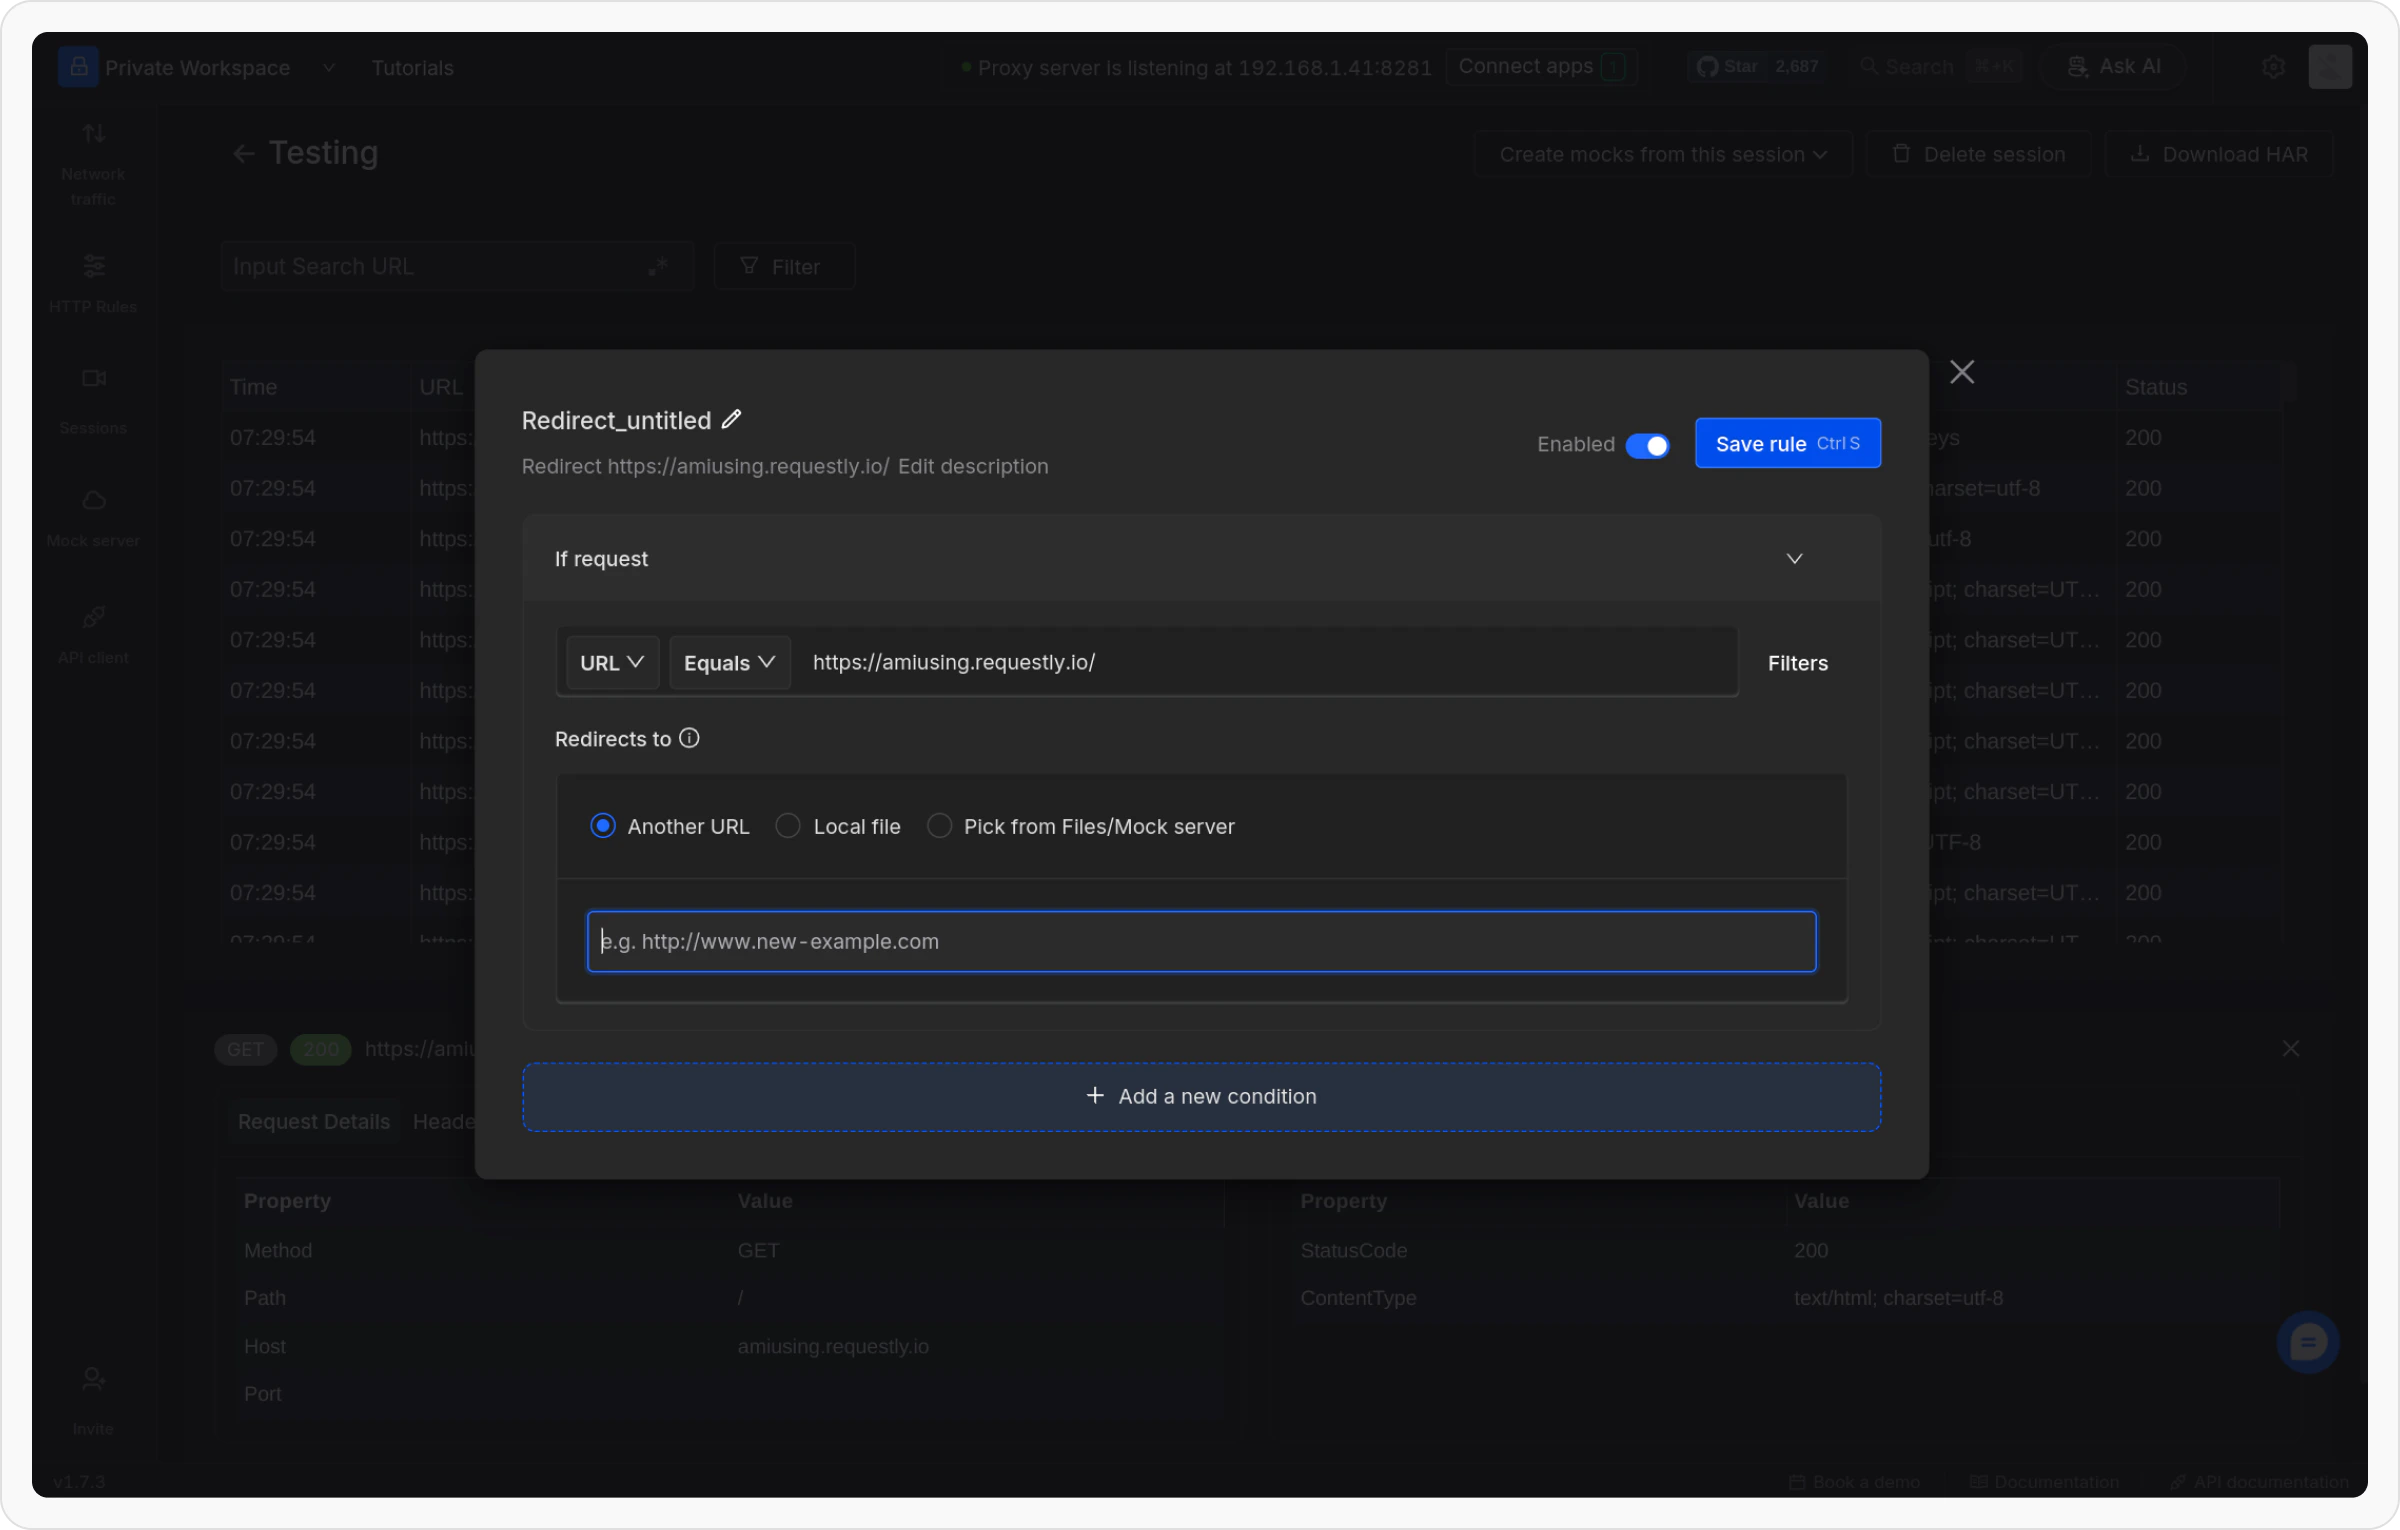 Click `Save` to finalize and apply the rule.
### Edit and Replay
The Edit and Replay feature lets you send API requests to an endpoint and modify various parameters like headers, body, query parameters, and more. This functionality acts as an integrated API client within your sessions, making it easier to test and modify API requests directly.
Click `Save` to finalize and apply the rule.
### Edit and Replay
The Edit and Replay feature lets you send API requests to an endpoint and modify various parameters like headers, body, query parameters, and more. This functionality acts as an integrated API client within your sessions, making it easier to test and modify API requests directly.
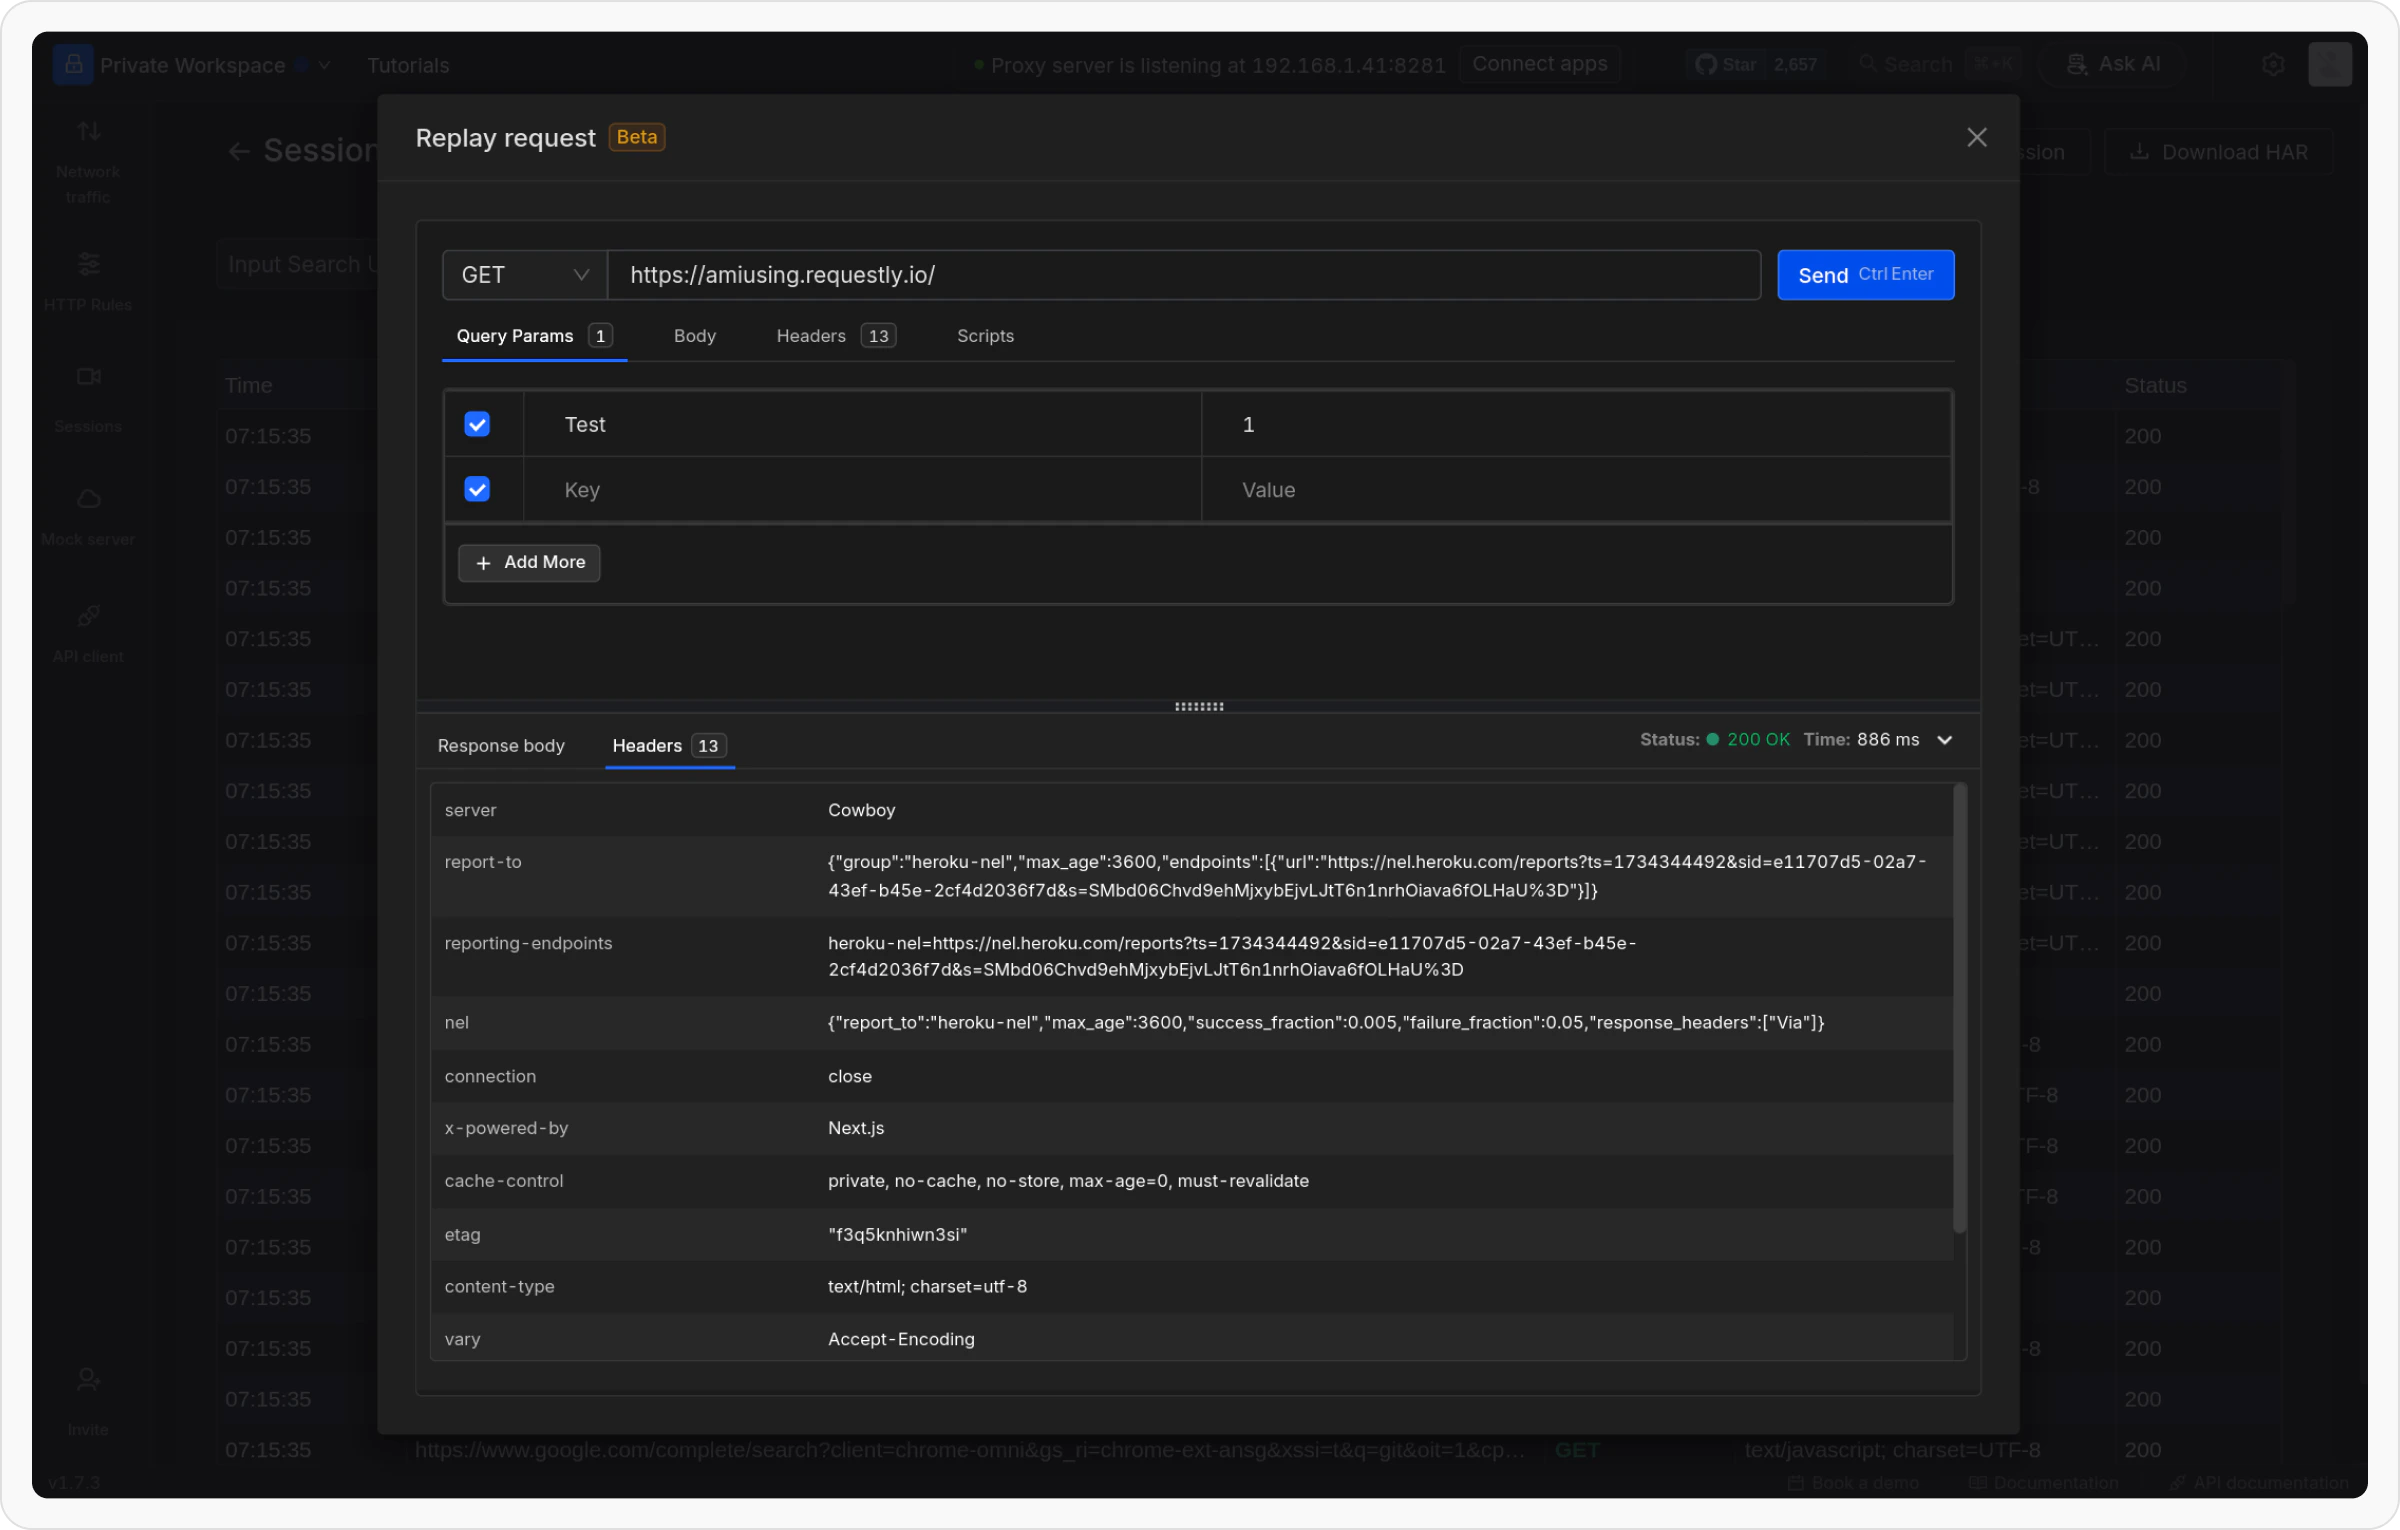 Here’s how to use Edit and Replay :
In your session, choose the interaction or API request you want to analyze. **Right-click** the session and click **Edit and Replay**.
Here’s how to use Edit and Replay :
In your session, choose the interaction or API request you want to analyze. **Right-click** the session and click **Edit and Replay**.
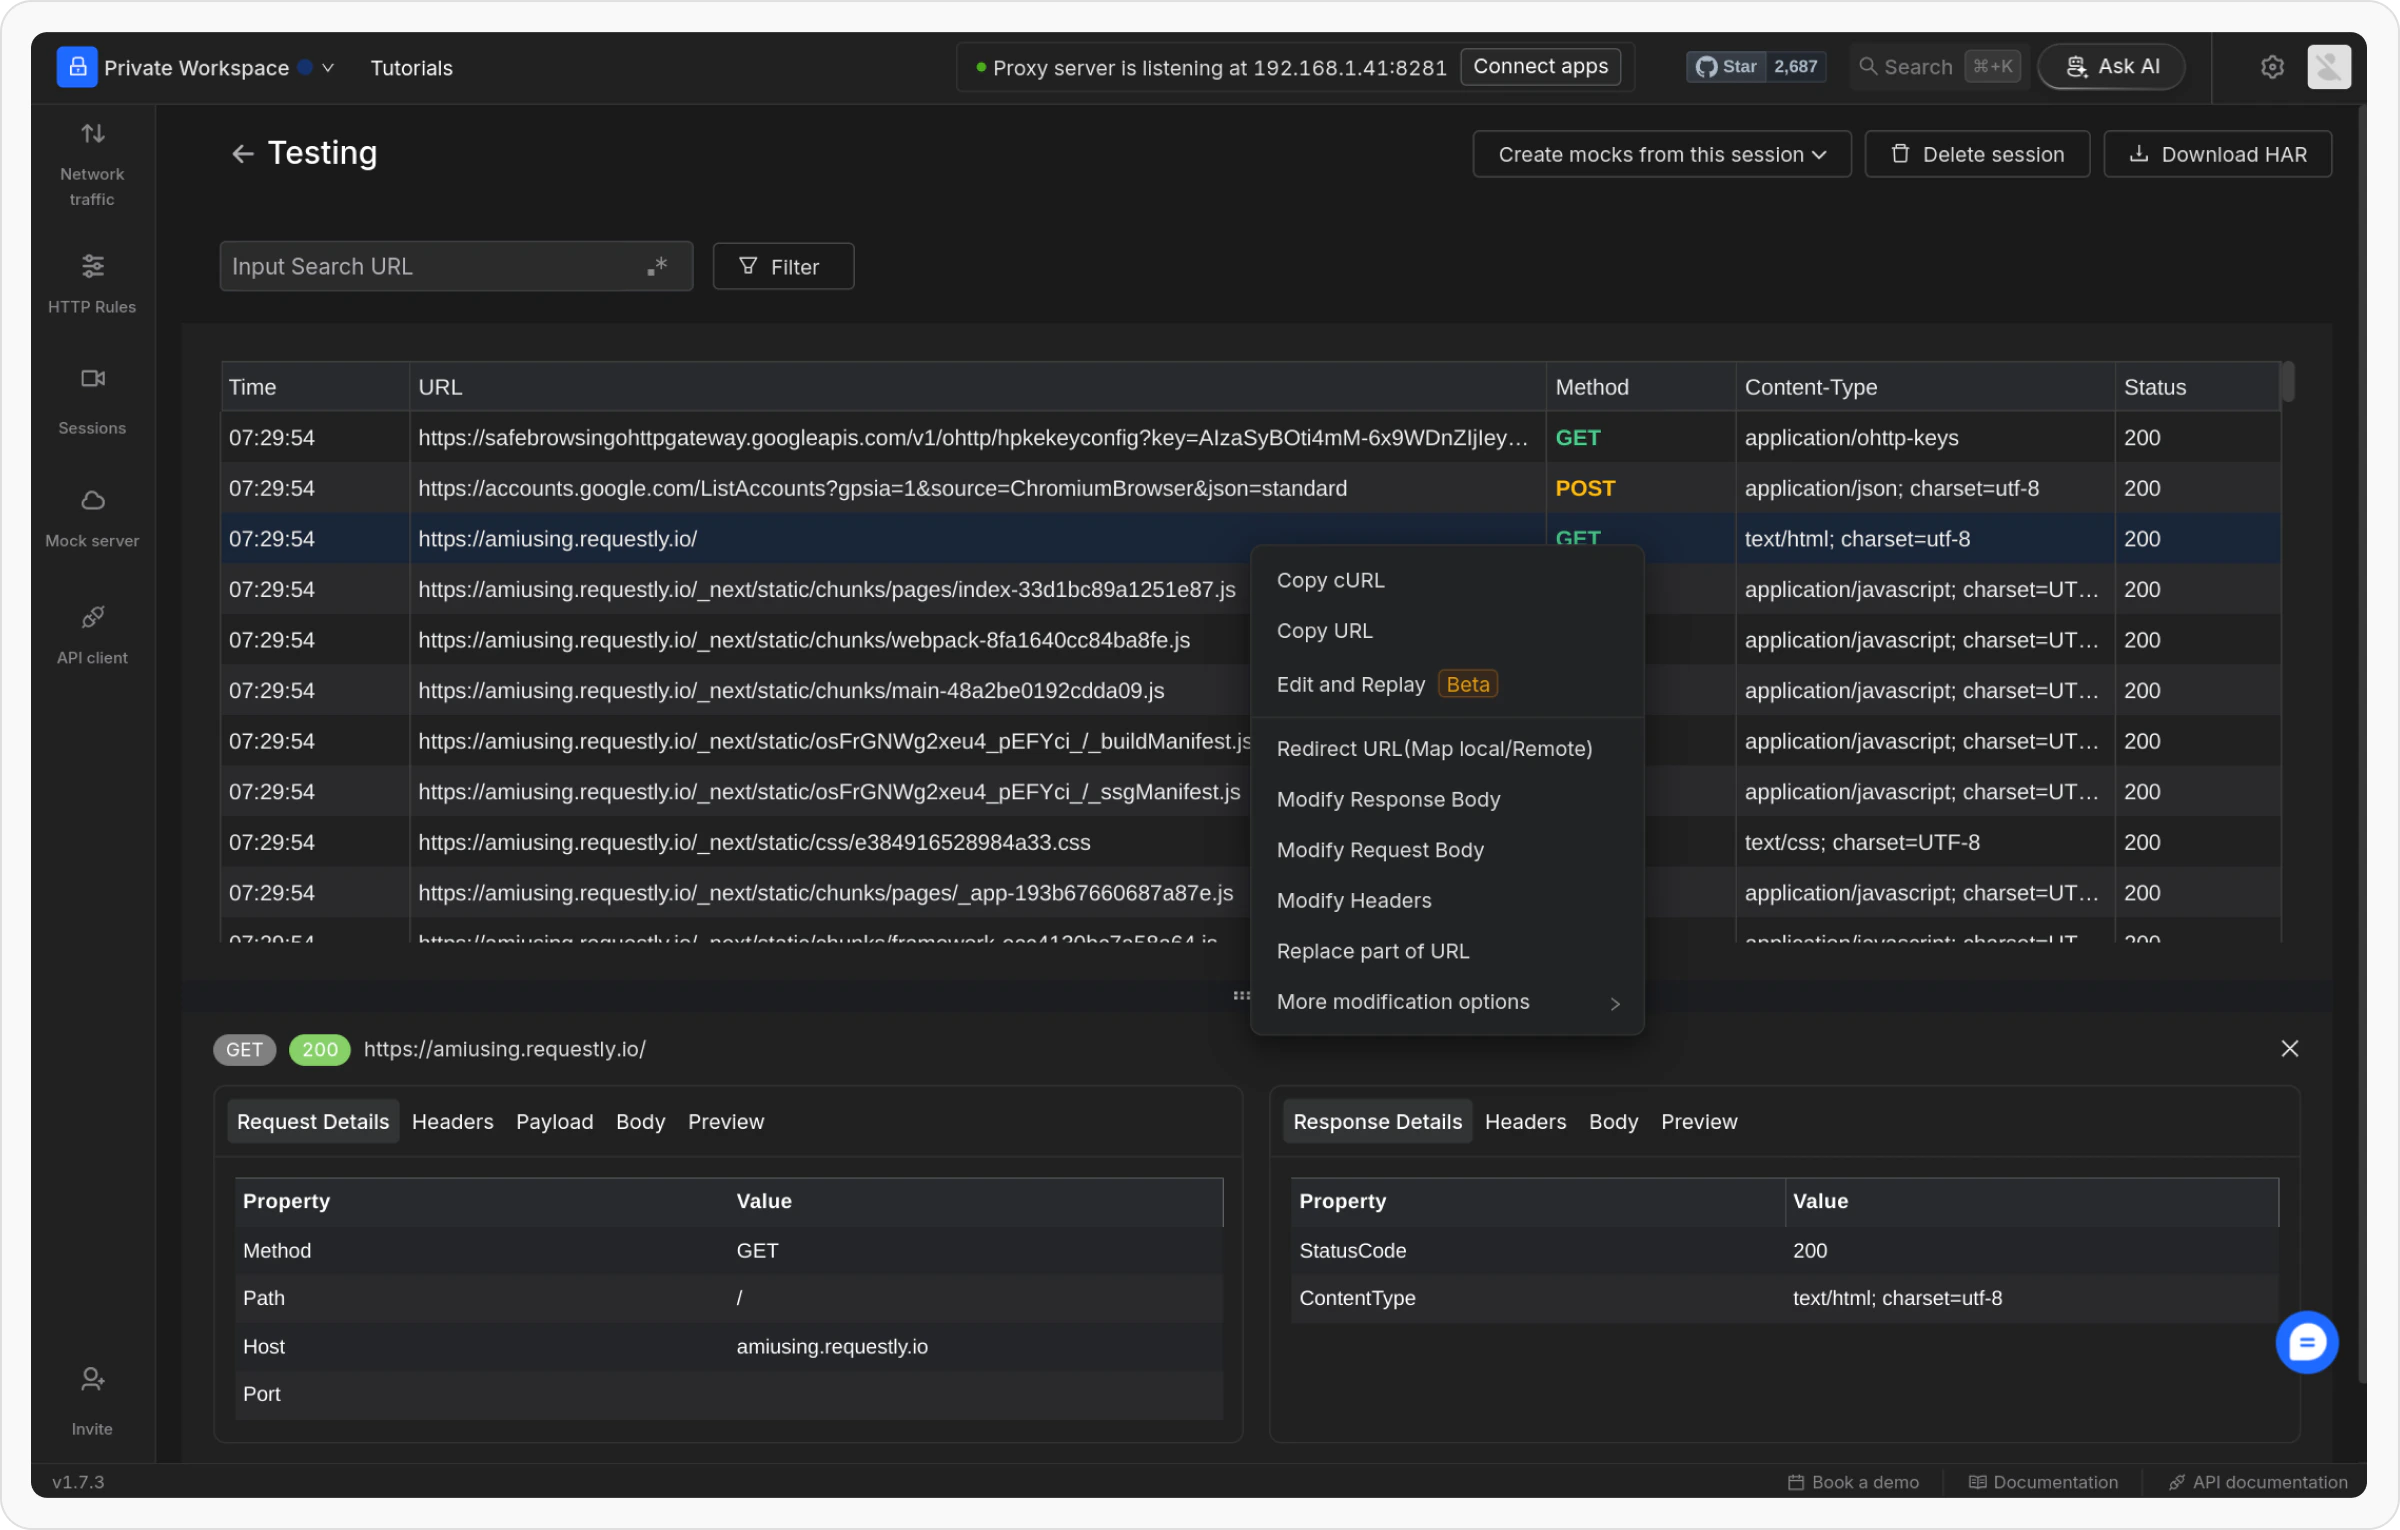 Review the recorded parameters, including headers, body, and query parameters, to understand the request behavior.
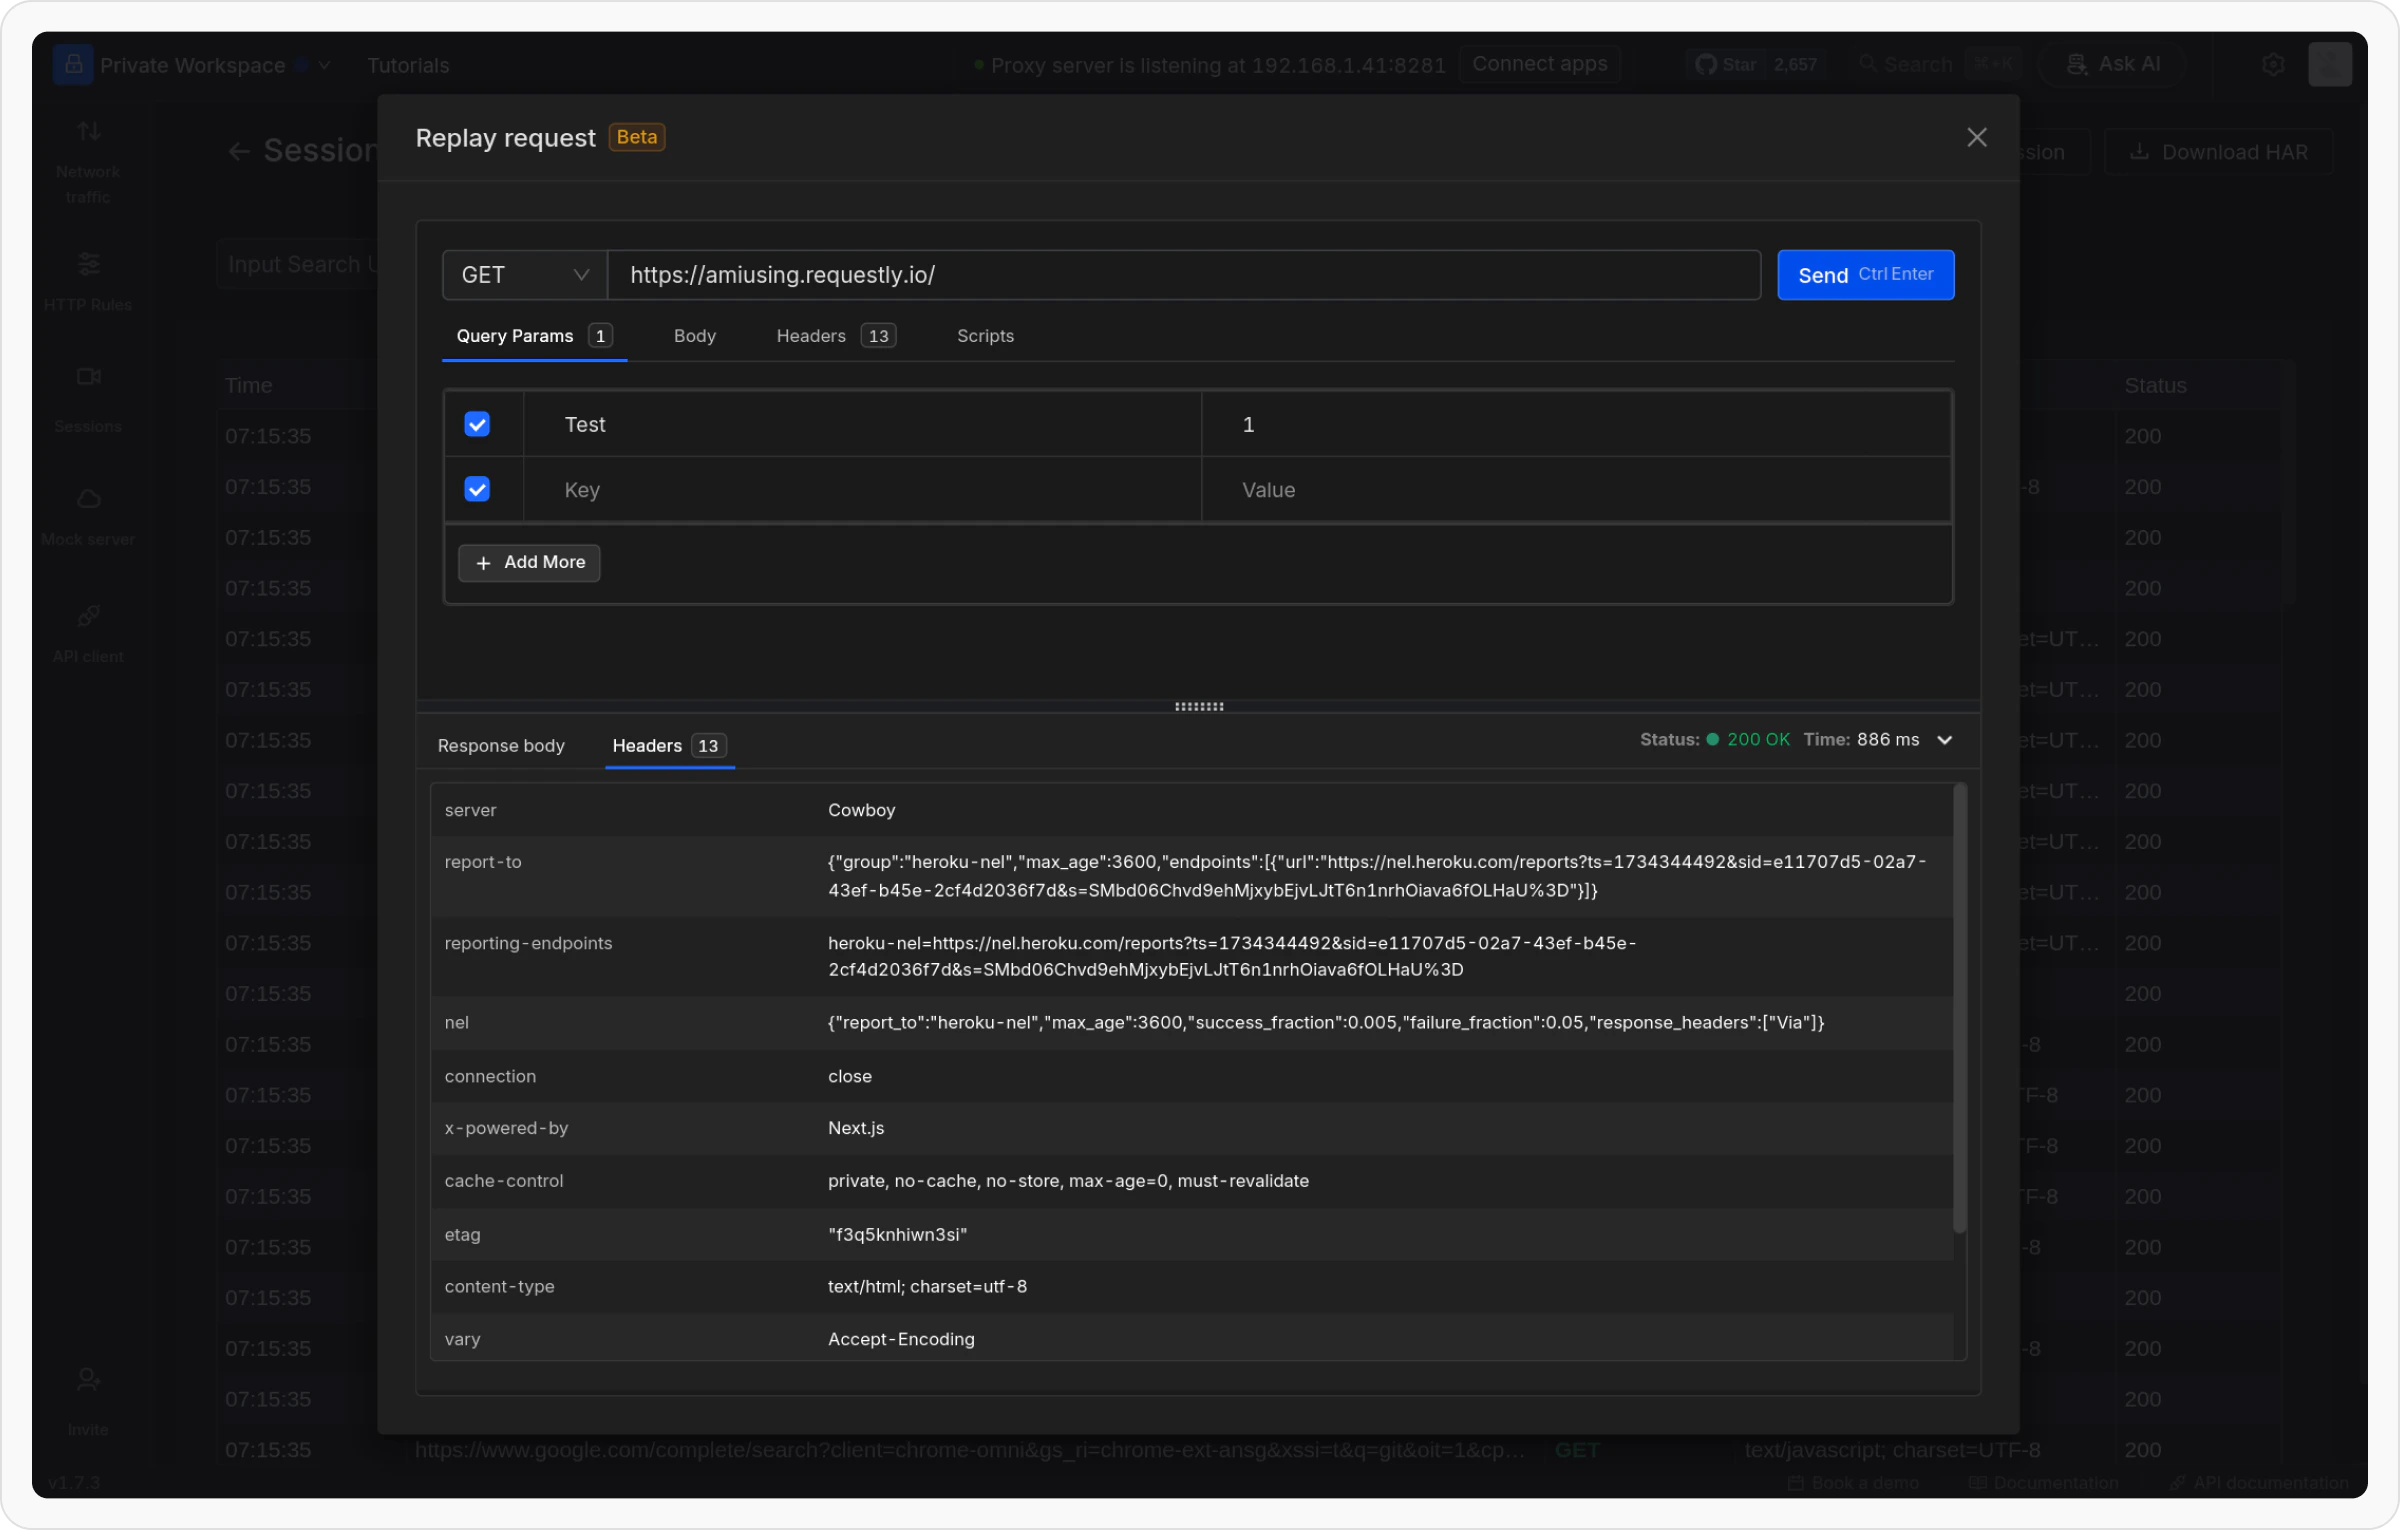 After analyzing the session, click the **Send** button to resend the modified request and debug the issue effectively.