> ## Documentation Index
> Fetch the complete documentation index at: https://interceptor-docs.requestly.com/llms.txt
> Use this file to discover all available pages before exploring further.
# iOS Devices Interception
> Learn how to set up Requestly Interceptor to intercept, monitor, and debug HTTP requests on your iOS Apps for iOS app development, debugging, and testing.
***
When working with iOS apps, debugging HTTP requests can be challenging. Requestly Interceptor offers an easy-to-use solution for monitoring, modifying, and debugging HTTP requests and responses during development or QA testing. Once you're familiar with the [HTTP Interceptor and network table](/interceptor/overview), you can follow step-by-step instructions to set up Requestly Interceptor for intercepting network traffic on your iOS devices, ensuring a fully functional interception setup for your iOS app development needs.
iOS device interception is only supported on the Desktop App.
## **Setup iOS Devices for Interception**
Setting up HTTP interception on physical iOS devices requires configuring a proxy and CA Certificate to intercept network traffic.
### Part 1: Configure Proxy
Connect your iOS Device(iPhone or iPad) on the same network as your computer having a Desktop App.
These steps are available on the Desktop app as well.\
\
To open, click on `Connect App` button, and switch to `Mobile apps & browsers` tab.\
Click on `Setup Instructions` next to iOS.
On your iOS device, navigate to `Settings` → `Wi-Fi` → `Select current Wi-Fi` → `Configure Proxy`
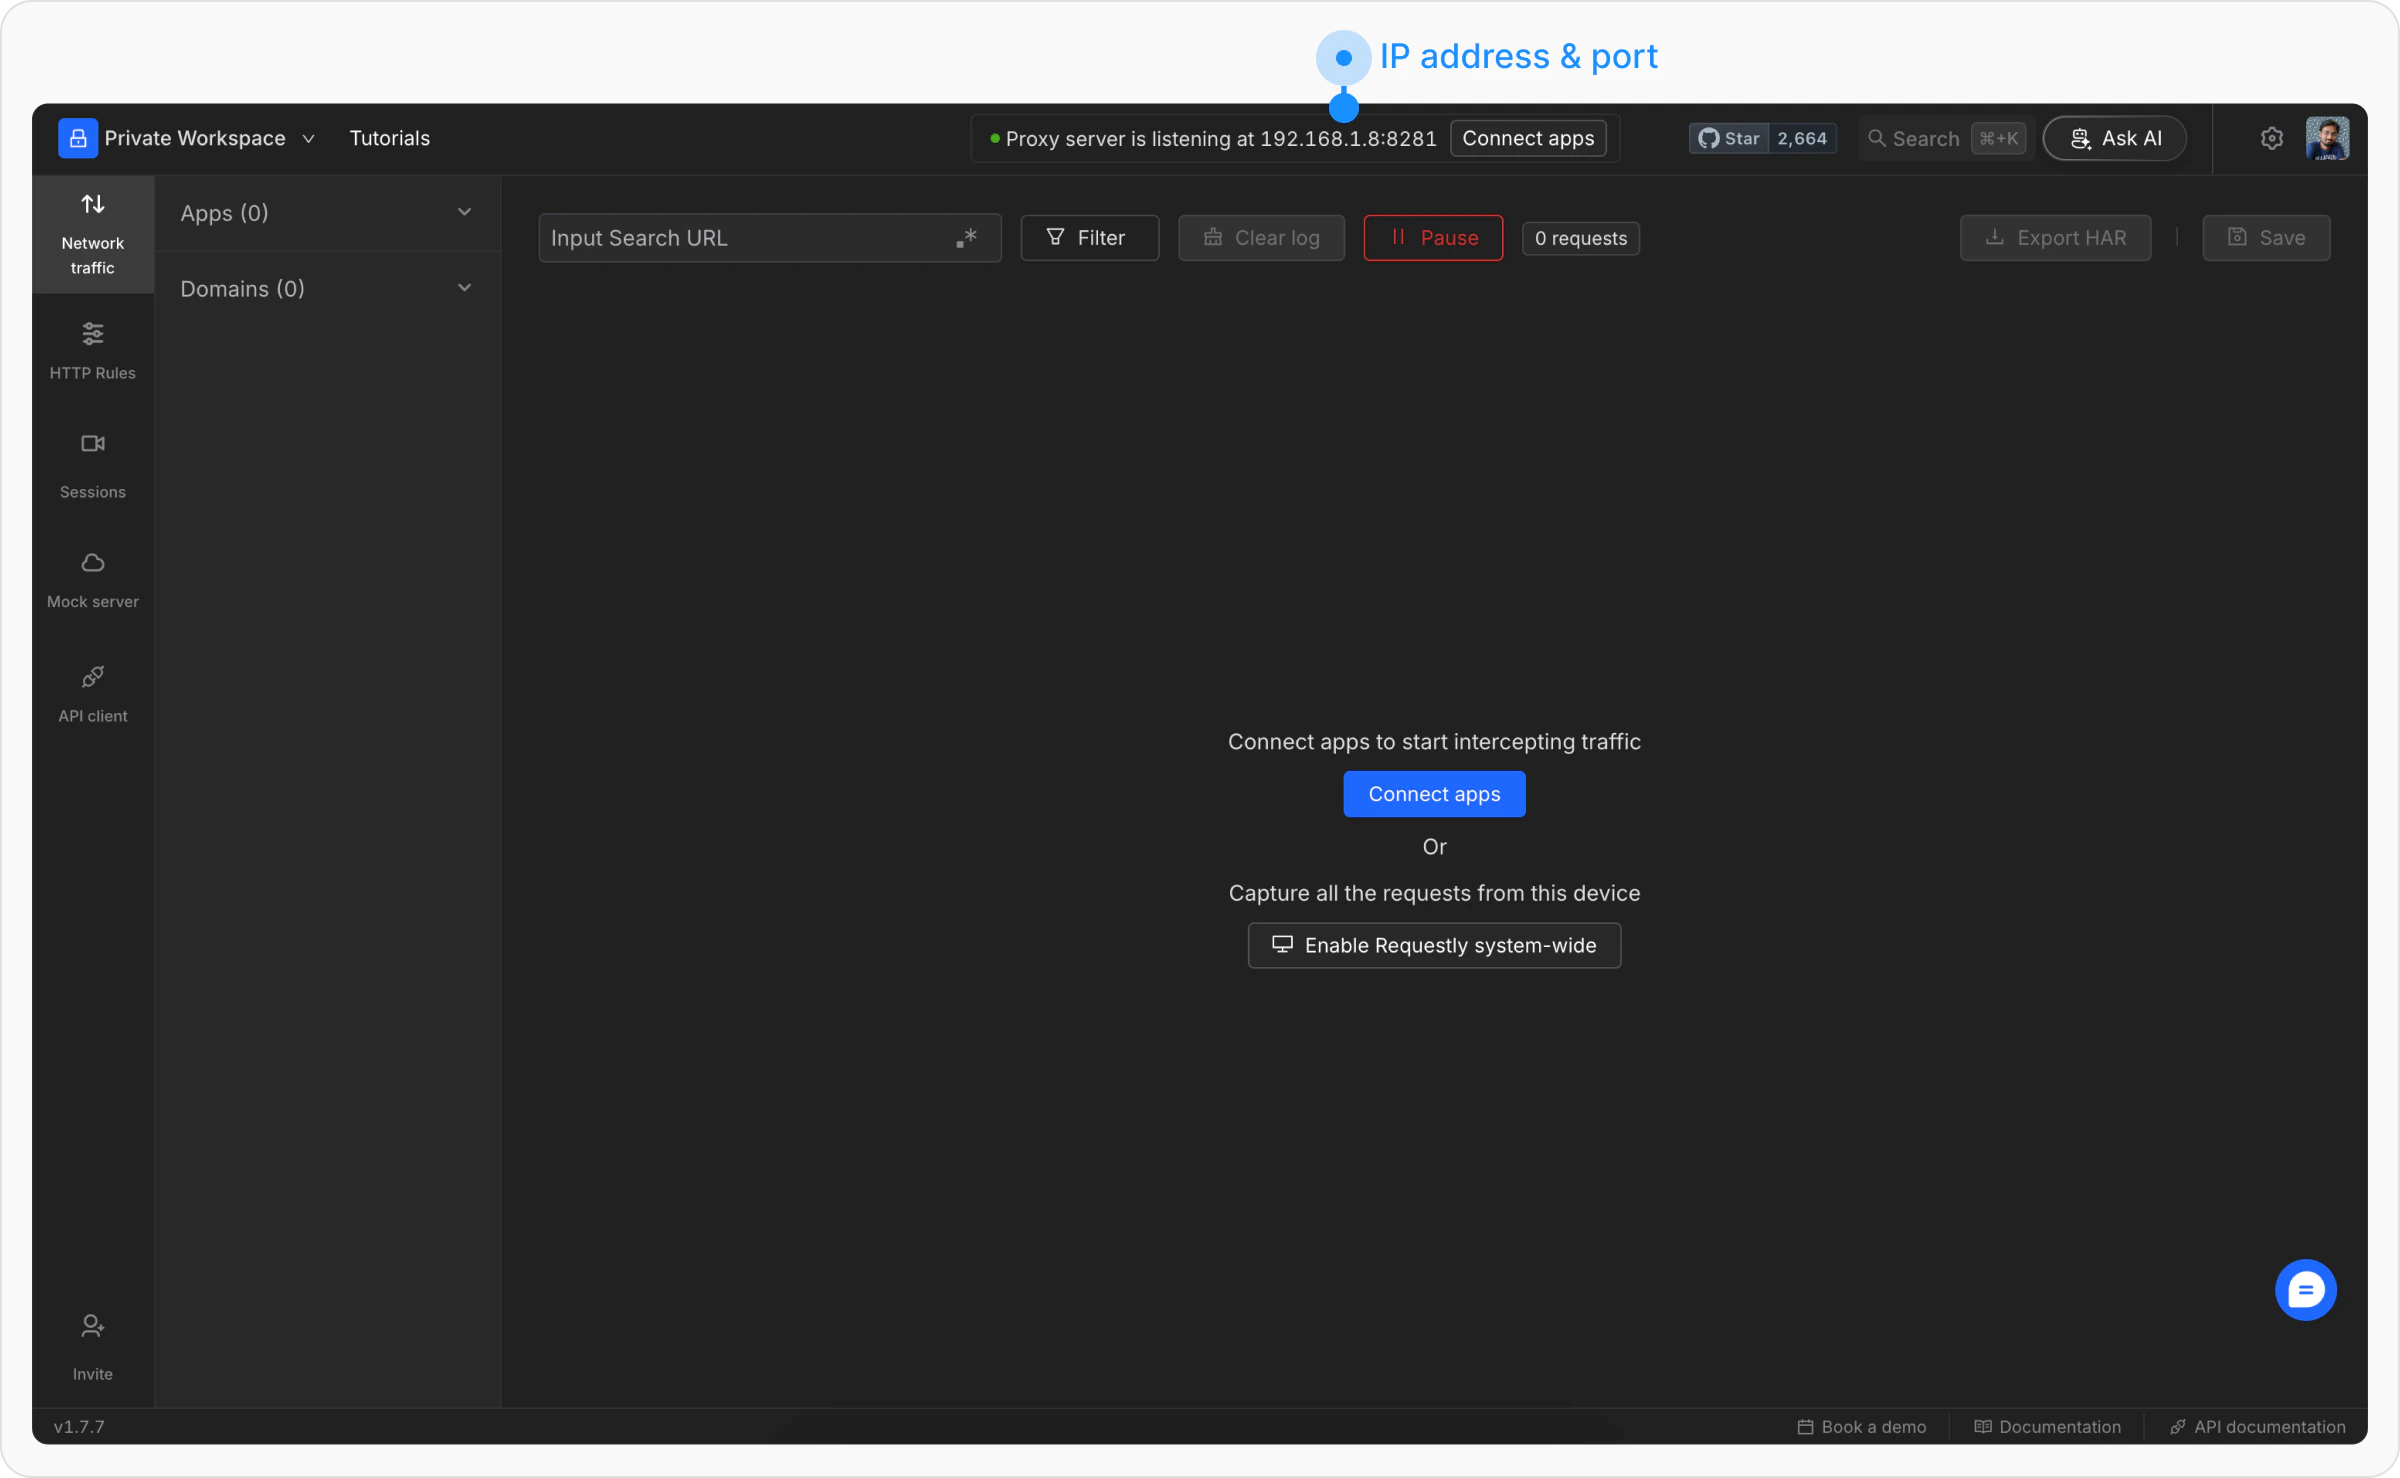
 Set the proxy settings to `Manual`. Then, enter the IP address of the computer and the proxy port. You can find these on the top banner of the Requestly Interceptor desktop app.
 To ensure that the proxy has been set, visit [**http://amiusing.requestly.io**](http://amiusing.requestly.io)**(remember to use HTTP, not HTTPS)** on Safari Browser of your mobile. If the rendered page shows success, the proxy is now correctly configured. You should be able to see some traffic on the Desktop app, but the body of the request/response is encrypted. To decrypt that we will have to install the CA Certificate in upcoming steps.
 ### Part 2: Install CA Certificate
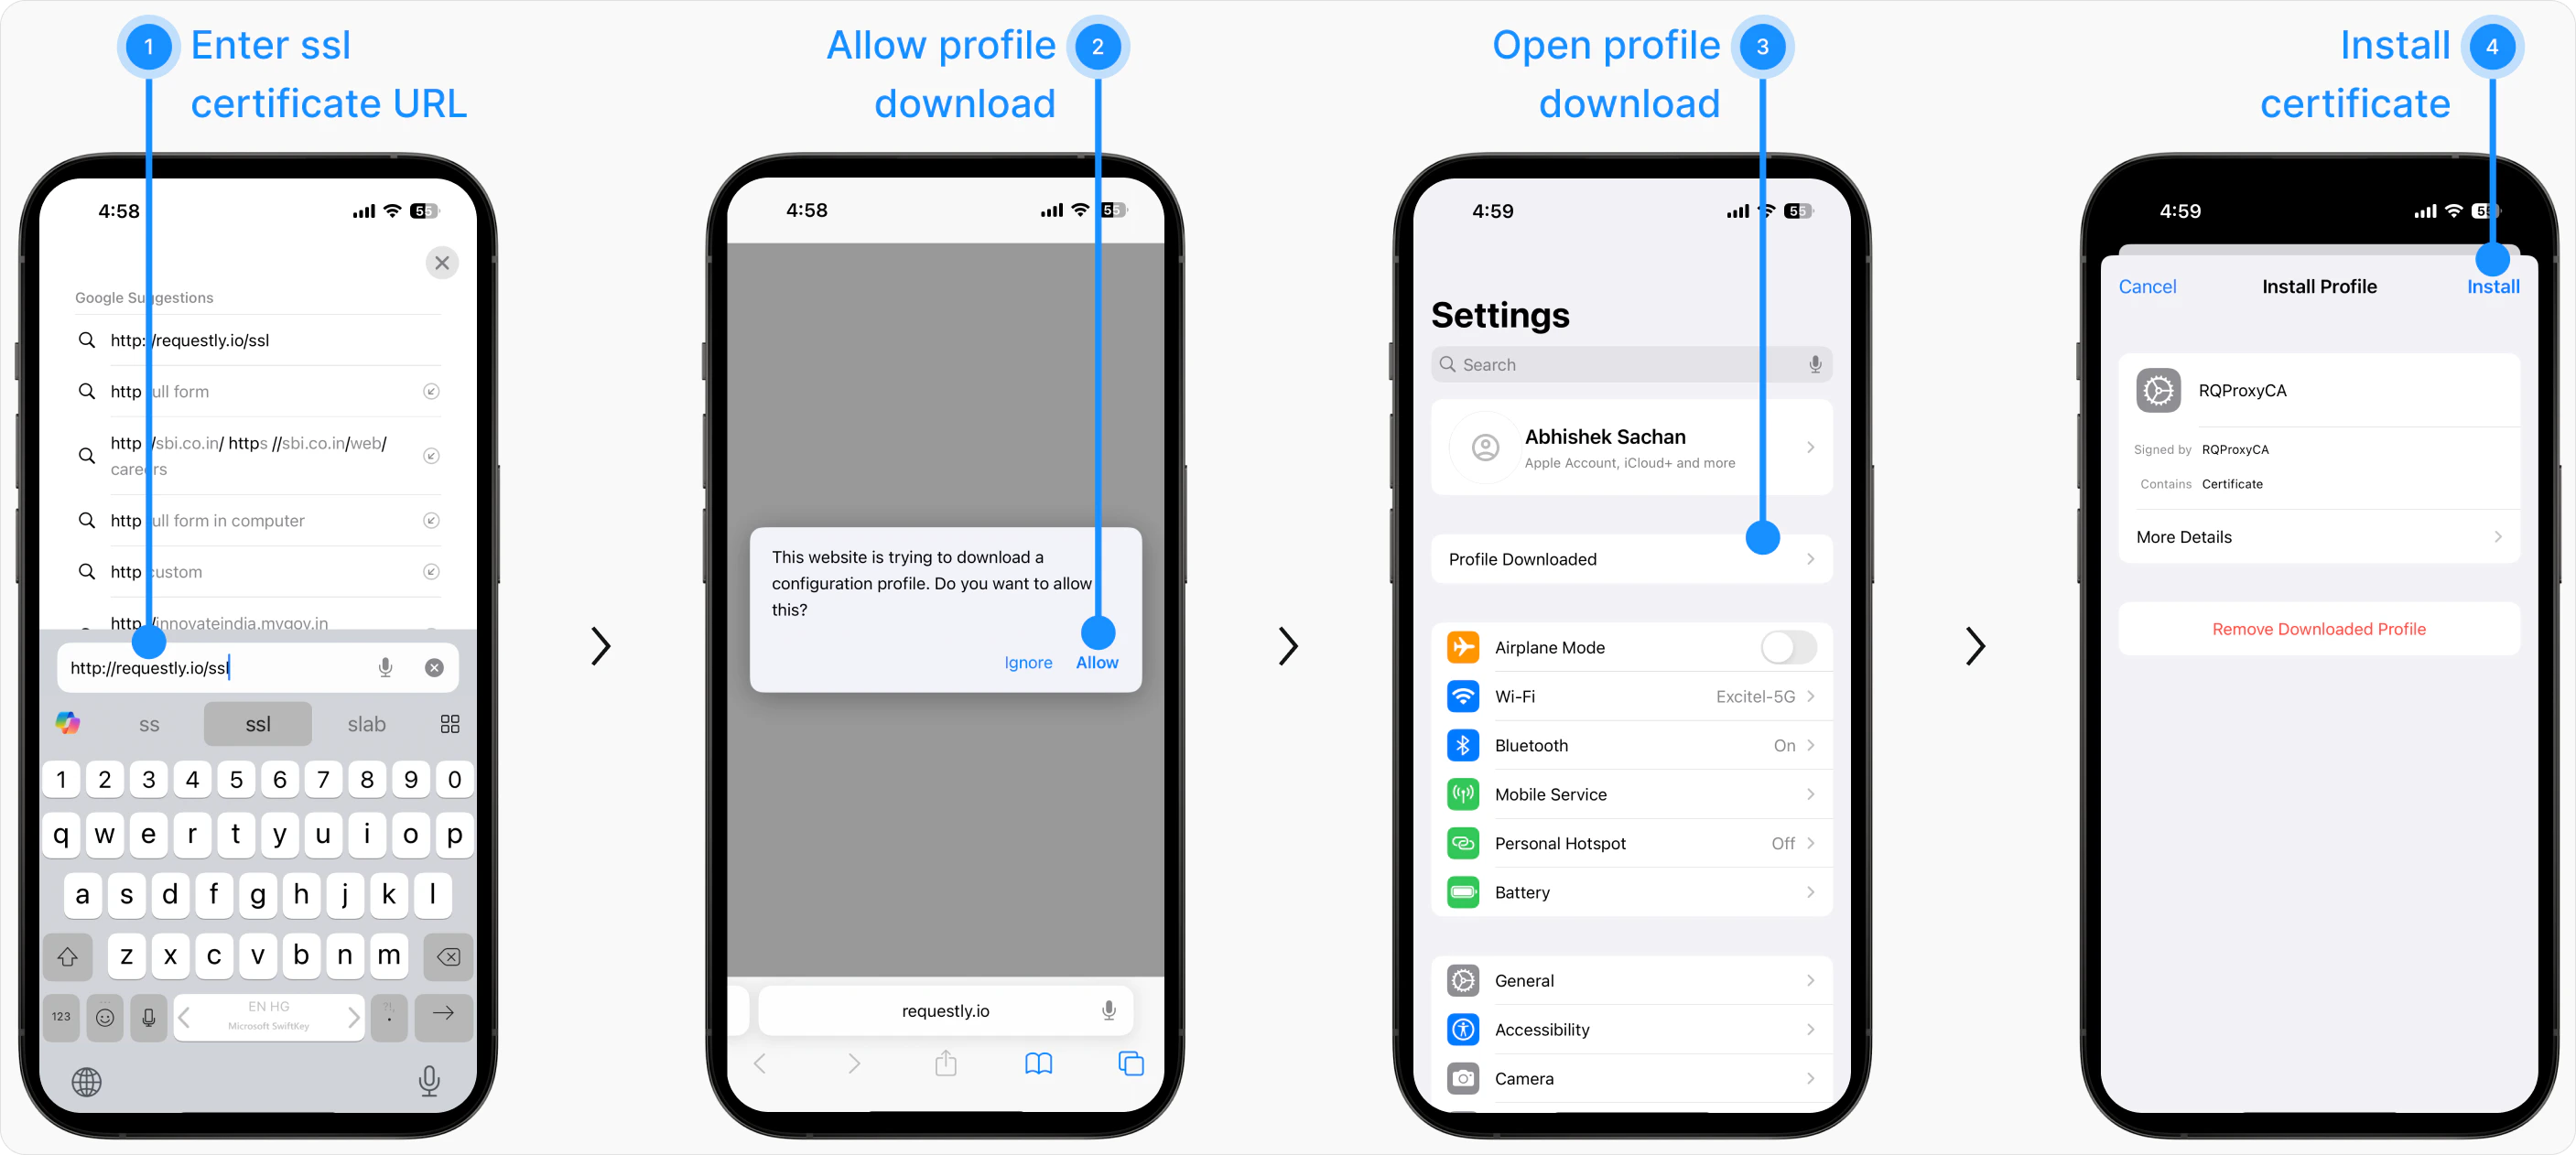
Now open Safari on your IOS device and go to [**http://requestly.io/ssl**](http://requestly.io/ssl)**(remember to use HTTP, not HTTPS)**. This should download a custom profile on your device which contains the Requestly Interceptor CA certificate.
Now to install the downloaded custom profile go to `Settings`. You should see a new option at the top that says Profile Downloaded. Select that to install the profile. Click on Install.
### Part 2: Install CA Certificate
Now open Safari on your IOS device and go to [**http://requestly.io/ssl**](http://requestly.io/ssl)**(remember to use HTTP, not HTTPS)**. This should download a custom profile on your device which contains the Requestly Interceptor CA certificate.
Now to install the downloaded custom profile go to `Settings`. You should see a new option at the top that says Profile Downloaded. Select that to install the profile. Click on Install.
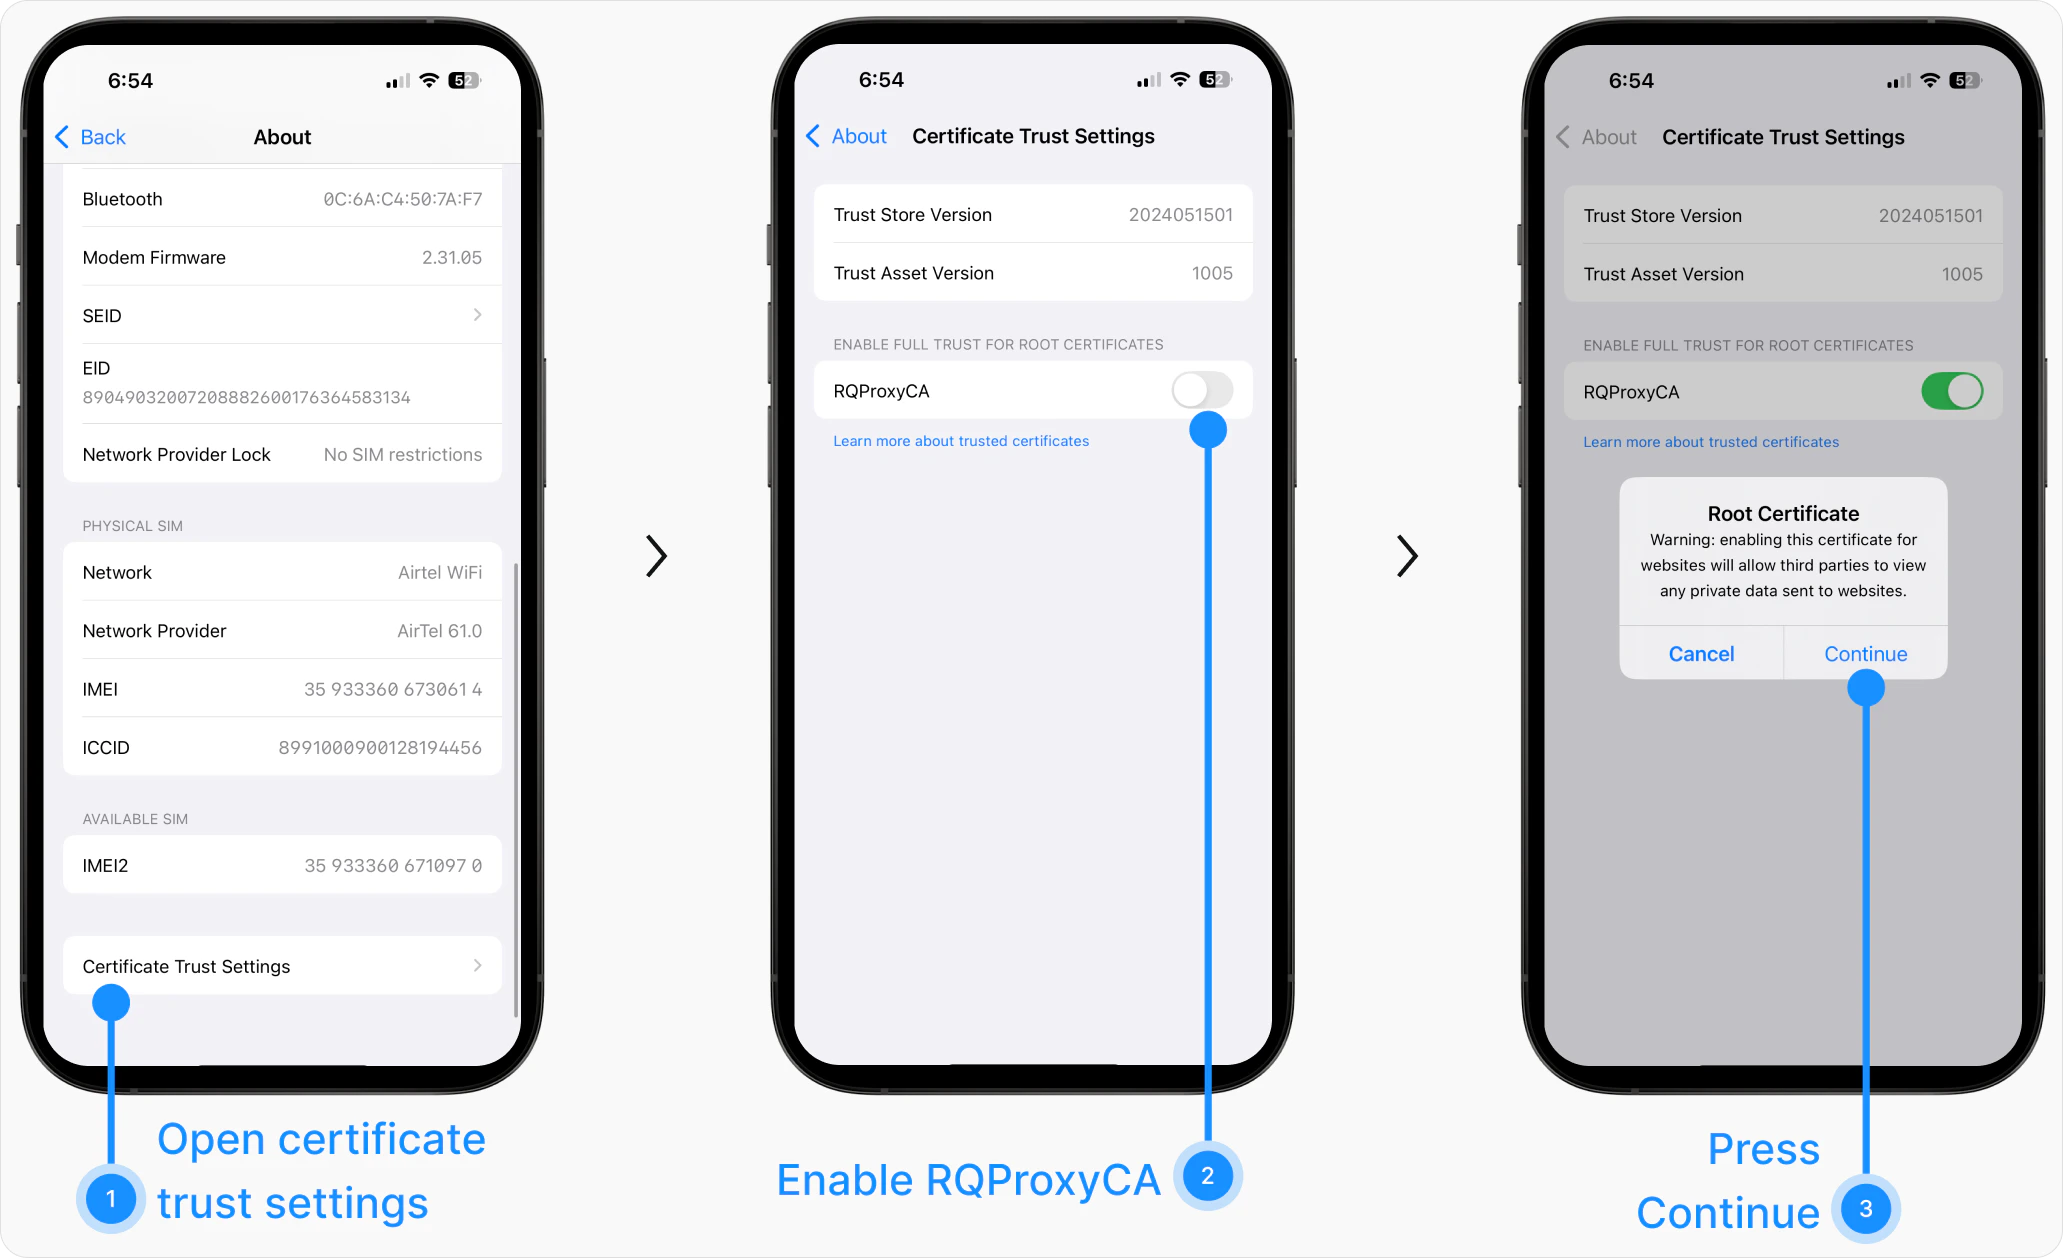
 Finally, you need to enable trust for CA certificates that were installed along with this custom profile. Go to `Settings` → `General` → `About` → `Certificate Trust Settings`. You should see a certificate under the name RQProxyCA. Enable the trust for Requestly Interceptor's certificate authority for intercepting HTTPS traffic.
 Once everything is setup properly you should be able to see decrypted traffic on Desktop App. Clear the log from the desktop app and check the request/response body of a few requests, you should be able to see readable data.
## **Turn off Interception**
Remember to disable the HTTP Proxy in your Settings when you stop using Requestly Interceptor, otherwise, you'll get confusing network failures in your applications! You just need to set the network proxy(part 1) the next time you want to debug with Requestly Interceptor.
1. Navigate to `Settings` → `Wi-Fi` → `Select current Wi-Fi` → `Configure Proxy`
2. Set the proxy settings to `Off`
Once everything is setup properly you should be able to see decrypted traffic on Desktop App. Clear the log from the desktop app and check the request/response body of a few requests, you should be able to see readable data.
## **Turn off Interception**
Remember to disable the HTTP Proxy in your Settings when you stop using Requestly Interceptor, otherwise, you'll get confusing network failures in your applications! You just need to set the network proxy(part 1) the next time you want to debug with Requestly Interceptor.
1. Navigate to `Settings` → `Wi-Fi` → `Select current Wi-Fi` → `Configure Proxy`
2. Set the proxy settings to `Off`